 Hyundai Sonata: AVN Head Unit. Repair procedures
Removal
AVN Head Unit
|
| 1. |
Disconnect the negative (-) battery terminal.
|
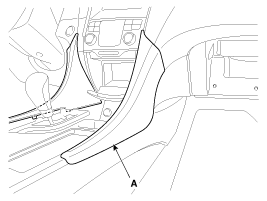
| 2. |
Remove the crash pad garnish (A).
|
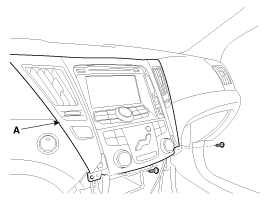
| 3. |
Remove the crash pad center fascia panel (A), after loosening
the mounting screws.
|
| 4. |
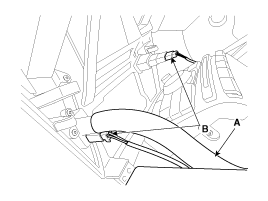
Disconnect the center fascia panel connectors (B), after removing
the air condition hose (A) from the upper side of center fascia panel.
|
| 5. |
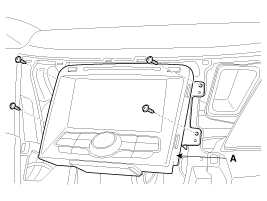
Remove the mounting screws then remove the AVN head unit (A).
|
| 6. |
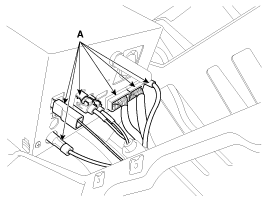
Remove the AVN head unit connectors and cables (A).
|
Roof Antenna (GPS + XM)
| 1. |
Remove the rear roof trim.
(Refer to the BD group - "Roof trim")
|
| 2. |
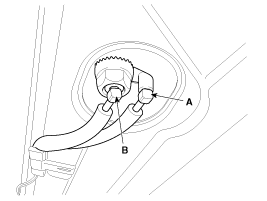
Disconnect the GPS (B) cable and XM cable (A) from the roof antenna.
|
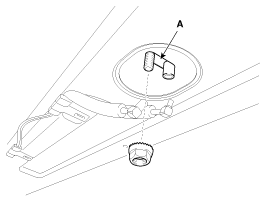
| 3. |
Remove the roof antenna (A) after removing a nut
|
Installation
AVN Head Unit
| 1. |
Connect the AVN head unit connectors and cable.
|
| 2. |
Install the AVN head unit.
|
| 3. |
Install the crash pad center fascia panel.
|
| 4. |
Install the crash pad garnish.
|
| 5. |
Check the audio system.
|
Roof Antenna (GPS + XM)
| 1. |
Installation the roof antenna.
|
| 2. |
Connect the GPS cable and XM cable.
|
| 3. |
Install the rear roof trim.
|
 AVN Head Unit. Components and Components Location
Components
AVN (A/V & Navigation) Head Unit Connector
Pin No.
Connector A
Connector B
Description
Remarks
...
 Multimedia Jack. Schematic Diagrams
Circuit Diagram
...
See also:
Trip Switch. Repair procedures
Inspection
1.
Check the audio remote control switch for resistance between No.3
and No.5 terminals in each switch position.
Switch
...
Shift Lever. Components and Components Location
Components
1. Shift lever assembly
2. Gear shift cable assembly
3. Clips
4. Retainer
...
MENU : My Music Mode
In My Music mode, press the key
to set the Repeat, Random, Information, Delete, Delete All, and Delete Selection
features.
Repeat
Press the key
► Set [ RPT] through the
TUNE knob or ...
