 Hyundai Sonata: Exhaust Manifold. Repair procedures
Removal and Installation
| 1. |
Remove the engine cover.
|
| 2. |
Disconnect the battery negative terminal.
|
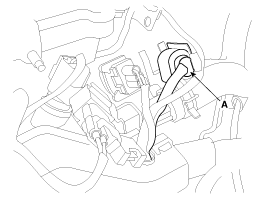
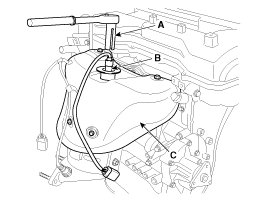
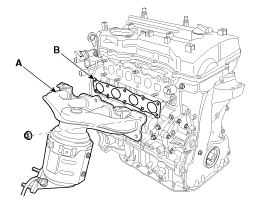
| 3. |
ULEV : Disconnect the front oxygen sensor connector
(A).
SULEV : Disconnect the front oxygen sensor connector
(A) and the rear oxygen sensor connector (B).
|
| 4. |
Remove the front muffler (A).
|
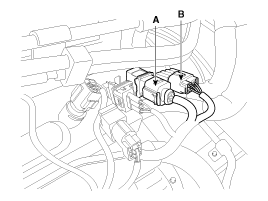
| 5. |
ULEV : Remove the exhaust manifold heat protector
(A).
SULEV : Using the SST (09392-2H100) (A), remove the
front oxygen sensor (B) and the remove the exhaust manifold heat protector
(C).
|
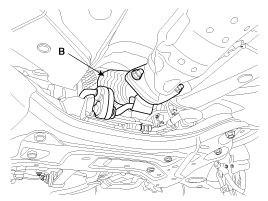
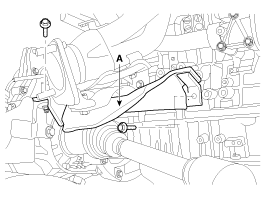
| 6. |
Remove the driveshaft heat protector (A).
|
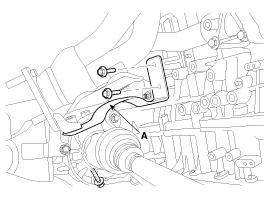
| 7. |
Remove the exhaust manifold stay (A).
[ULEV]
[SULEV]
|

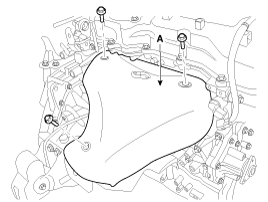
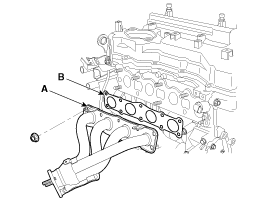
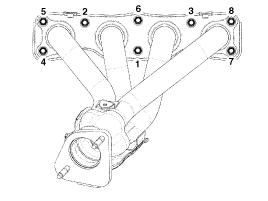
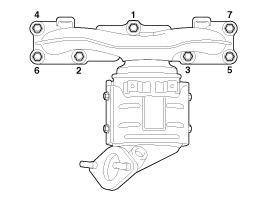
| 8. |
Remove the exhaust manifold (A) with the gasket (B).
[ULEV]
[SULEV]
When installing the intake manifold, tighten the
nuts with pre-torque first, and then tighten the nuts with specified
torque in the sequence shown.
[ULEV]
[SULEV]
|
| 9. |
Installation is reverse order of removal.
|
 Exhaust Manifold. Components and Components Location
Components
[ULEV]
1. Heat protector
2. Exhaust manifold
3. Exhaust manifold gasket
4. Exhaust manifold stay
[SULEV]
1. Heat protec ...
 Muffler. Components and Components Location
Components
1. Front muffler
2. Catalytic converter & center muffler assembly
3. Main muffler
4. Gasket
5. Hanger
...
See also:
Crankshaft Position Sensor (CKPS). Repair procedures
Inspection
1.
Check the signal waveform of the CMPS and CKPS using the GDS.
Specification:
Refer to “Wave Form”
...
Seat Belt Pretensioner (BPT). Repair procedures
Removal
1.
Disconnect the battery negative cable, and wait for at least three
minutes before beginning work.
2.
Using a flat-tip screwdr ...
Window opening and closing
To open or close a window, press down or pull up the front portion of the corresponding
switch to the first detent position (5). ...
