 Hyundai Sonata: Front Door. Repair procedures
Replacements
Door Trim Replacement
|
| 1. |
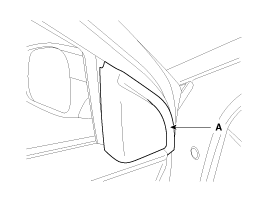
Using a screwdriver or remover, remove the quadrant inner cover
(A).
|
| 2. |
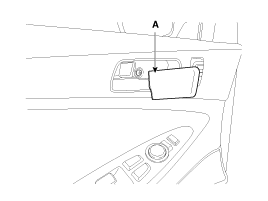
Remove the inside handle cover (A).
|
| 3. |
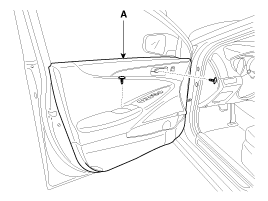
After loosening the mounting screws, then remove the front door
trim (A).
|
| 4. |
Remove the inside handle cage (A).
|
| 5. |
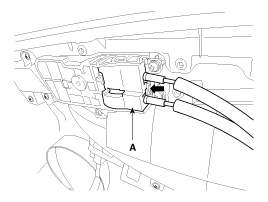
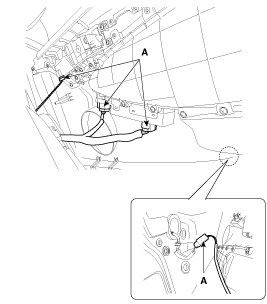
Disconnect the connectors (A), and then removing the front door
trim.
|
| 6. |
Installation is the reverse of removal.
|
Inside Handle Replacement
| 1. |
Remove the front door trim
|
| 2. |
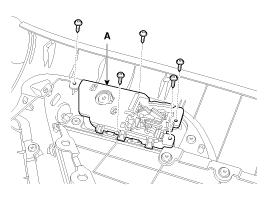
After loosening the mounting screws, then remove the inside handle
(A).
|
| 3. |
Installation is the reverse of removal.
|
Glass Replacement
| 1. |
Remove the front door trim.
|
| 2. |
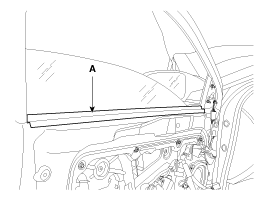
Remove the front door belt inside weatherstrip (A).
|
| 3. |
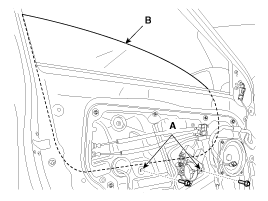
Remove the glass mounting hole plug (A).
|
| 4. |
Carefully adjust the glass (B) until you can see the bolts, then
loosen them. Separate the glass from the glass run and carefully pull
the glass out through the window slot.
|
| 5. |
Installation is the reverse of removal.
|
Speaker Replacement
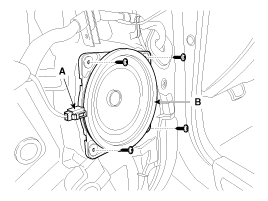
| 1. |
Remove the front door trim.
|
| 2. |
After loosening the mounting screws, then remove the speaker (B).
|
| 3. |
Disconnect the speaker connector (A).
|
| 4. |
Installation is the reverse of removal.
|
Power Window Motor Replacement
| 1. |
Remove the front door trim.
|
| 2. |
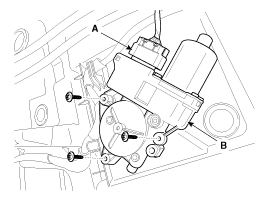
Disconnect the power window motor connector (A).
|
| 3. |
After loosening the mounting screws, then remove the power window
motor (B).
|
| 4. |
Installation is the reverse of removal.
|
Door Module Assembly Replacement
| 1. |
Remove the following parts:
|
| 2. |
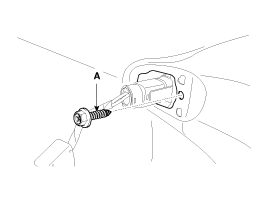
Loosen the mounting screw (A).
|
| 3. |
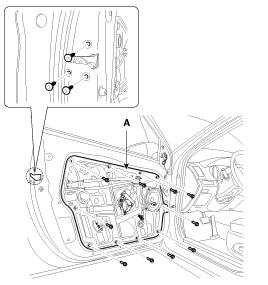
After loosening the door module mounting bolts, then remove the
door module (A).
|
| 4. |
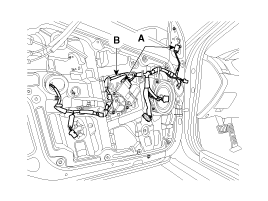
Disconnect the connectors (A) and door module wiring harness (B).
|
| 5. |
Installation is the reverse of removal.
|
Outside Handle Replacement
| 1. |
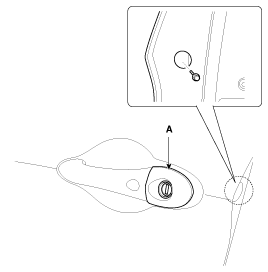
After loosening the mounting bolt, then remove the outside handle
cover (A).
|
| 2. |
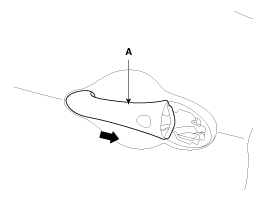
Remove the outside handle (A) by sliding it rearward.
|
| 3. |
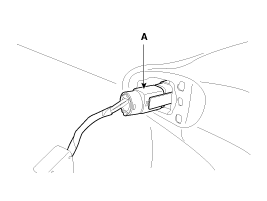
Disconnect the connector (A).
|
| 4. |
Installation is the reverse of removal.
|
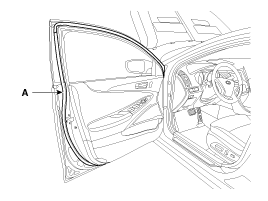
Door Weatherstrip Replacement
| 1. |
Loosen the checker mounting bolts.
|
| 2. |
Detach the clips, then remove the weatherstrip (A).
|
| 3. |
Installation is the reverse of removal.
|
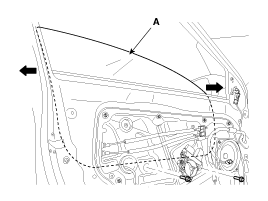
Adjustment
Glass Adjustment
|
| 1. |
Remove the following parts:
|
| 2. |
Carefully move the glass (A) until the glass mounting bolts are
visible, then loosen them.
|
| 3. |
Check that the glass moves smoothly.
|
| 4. |
Raise the glass fully, and check for gaps. Check that the glass
contacts the glass run channel evenly.
|
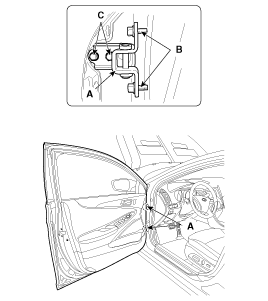
Door Position Adjustment
|
| 1. |
Place the vehicle on a firm, level surface when adjusting the
doors.
|
| 2. |
Check that the door and body edges are parallel.
|
| 3. |
Adjust at the hinges (A):
|
| 4. |
Grease the pivot portions of the hinges indicated.
|
| 5. |
Check for water leaks.
|
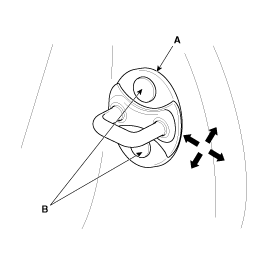
Door Striker Adjustment
Make sure the door latches securely without slamming it. If necessary
adjust the striker (A): The striker nuts are fixed. The striker can be fine
adjusted up or down, and in or out.
| 1. |
Loosen the screws (B) just enough for the striker to move.
|
| 2. |
Tap on the striker with a plastic hammer to adjust the striker.
The striker will not move much, but will give some adjustment.
|
| 3. |
Hold the outer handle out, and push the door against the body
to be sure the striker allows a flush fit. If the door latches properly,
tighten the screws and recheck.
|
 Front Door. Components and Components Location
Components
1. Door module
2. Window glass
3. Outside handle
4. Outside handle cover
5. Door lock assembly
6.Door handle pad
7. Door panel
8. Door chec ...
 Rear Door. Components and Components Location
Components
1. Door module
2. Window glass
3. Outside handle
4.Outside handle cover
5.Door handle pad
6. Door checker
7. Door speaker
8.Hole plug
...
See also:
Child-protector rear door lock
The child safety lock is provided to help prevent children from accidentally
opening the rear doors from inside the vehicle. The rear door safety locks should
be used whenever children are in th ...
High beam operation
To turn on the high beam headlights, push the lever away from you. Pull it back
for low beams.
The high beam indicator will light when the headlight high beams are switched
on.
To prevent th ...
Record your key number
■ Type A
■ Type B
...

