 Hyundai Sonata: Front Seat. Repair procedures
Replaccement
| 1. |
Remove the seat assembly mounting cover.
|
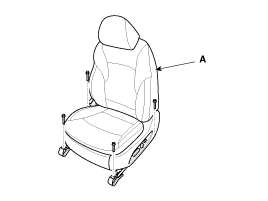
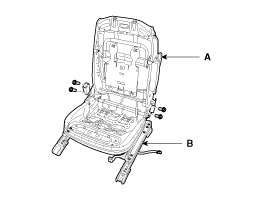
| 2. |
After loosening the seat assembly mounting bolts, remove the seat
assembly (A).
|
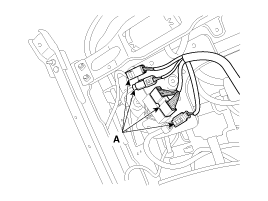
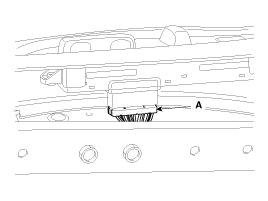
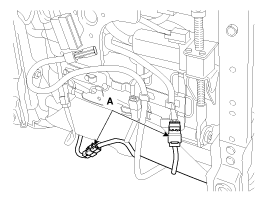
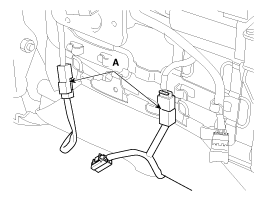
| 3. |
Disconnect the connectors (A).
[Driver's]
[Passenger's]
|
| 4. |
Installation is the reverse of removal.
|
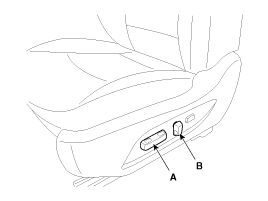
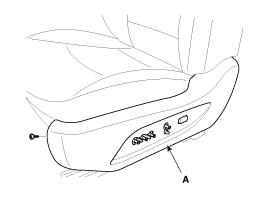
| 1. |
Remove the recliner switch (A) and hight switch (B).
|
| 2. |
After loosening the mounting screws, then remove the recliner
center cover(A).
|

| 3. |
After loosening the mounting screws, and then remove the recliner
cover(A).
|
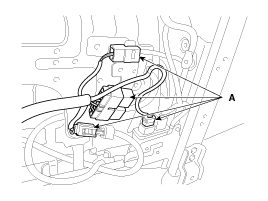
| 4. |
Disconnect the connector (A).
|
| 5. |
Installation is the reverse of removal.
|
| 1. |
Remove front seat assembly.
|
| 2. |
Remove the headrest.
|
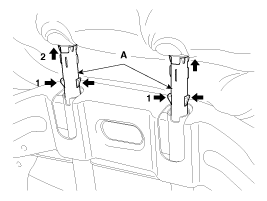
| 3. |
Push the clips (B) from the seat back panel (A).
|
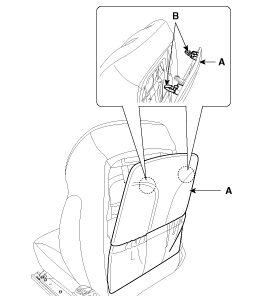
| 4. |
Push the protector (A) by the seat back frame.
|
| 5. |
Disconnect the connector (A) mounting clip.
|
| 6. |
Pull out the headrest guides (A) while pinching the end of the
guides, and remove them.
|
| 7. |
Remove the seat back from the frame.
|
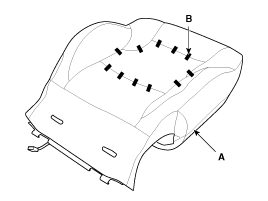
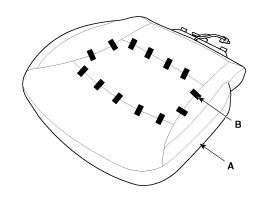
| 8. |
After removing the hogring clips (B) on the front of seat back
and remove the seat back cover (A).
|
| 9. |
Installation is the reverse of removal.
|

| 1. |
Remove front seat assembly.
|
| 2. |
Remove the recliner cover.
|
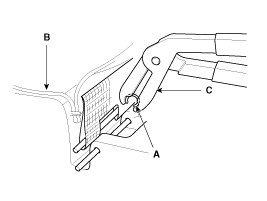
| 3. |
Push the protecter(A), and then seat cushion cover (C) from the
frame(B).
|
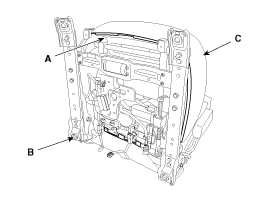
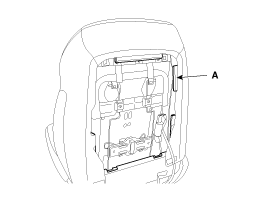
| 4. |
Disconnect the connectors (A).
|
| 5. |
After removing the hogring clips (B) on the front of seat cushion
and remove the seat cushion cover (A).
|
| 6. |
Installation is the reverse of removal.
|
| 1. |
Remove the front seat assembly.
|
| 2. |
Remove the seat back cover.
|
| 3. |
Remove the seat cushion cover.
|
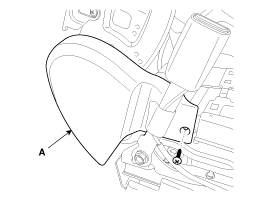
| 4. |
After loosening the mounting screw, then remove the front seat
shield cover (A).
|
| 5. |
After loosening the mounting bolts, then disconnect the seat back
frame (A) and seat cushion frame (B).
|
| 6. |
Installation is the reverse of removal.
|
 Front Seat. Components and Components Location
Components
1. Headrest
2. Seat back panel
3. Seat back frame
4. Seat back cover
5. Seat cushion cover
6. Shield cover
7. Seat cushion frame
8. ...
 Rear Seat. Components and Components Location
Components
1. Rear seat back
2. Rear seat cushion
3. Armrest
...
See also:
Driver Airbag (DAB) Module and Clock Spring. Repair procedures
Removal
1.
Disconnect the battery negative cable and wait for at least three
minutes before beginning work.
2.
Remove the driver airbag m ...
Crash Pad. Components and Components Location
Components
1. Main crash pad
2. Air vent
3. Center air vent
4. Cluster lower panel
5. Cluster assembly
6. Cluster facia side panel
7. Key set bezel
8. ...
Glove box
The glove box can be locked and unlocked with a master key (or the mechanical
key of the smartkey) (1).
To open the glove box, pull the handle and the glove box will automatically open.
Close ...
