 Hyundai Sonata: Hood. Repair procedures
Replacement
Hood Assembly Replacement
|
| 1. |
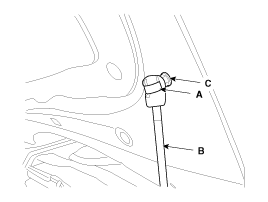
Using a screwdriver, lift the socket clips (A) up slightly on
both ends of the lifter (B), and then remove the lifter from the bracket
(C).
|
| 2. |
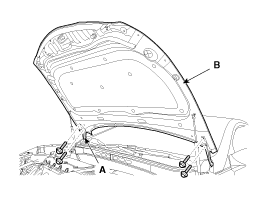
After loosening the hood hinge (A) mounting bolts, remove the
hood panel (B).
|
| 3. |
Installation is the reverse of removal.
|
Hood Insulator Pad Replacement
| 1. |
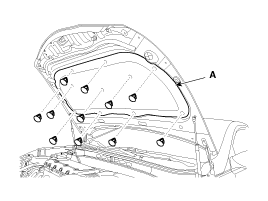
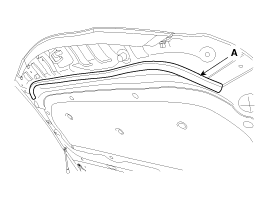
Using a clip remover, detach the clips, and remove the hood insulator
Pad (A).
|
| 2. |
Installation is the reverse of removal.
|
Hood Lift Replacement
| 1. |
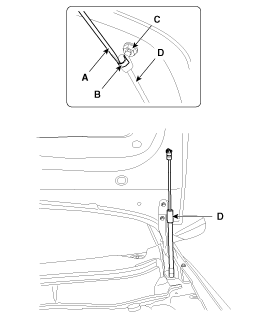
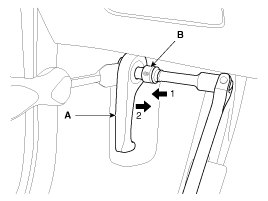
Using a screwdriver (A), lift the socket clips (B) up slightly
on both ends of the lifter (D), and then remove the lifter from the
bracket (C).
|
| 2. |
Installation is the reverse of removal.
|
Hood Seal Weatherstrip Replacement
| 1. |
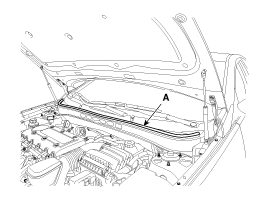
Detach the clips, then remove the hood seal weatherstrip (A).
|
| 2. |
Installation is the reverse of removal.
|
Hood Weatherstrip Replacement
| 1. |
Detach the clips, remove the hood weatherstrip (A).
|
| 2. |
Installation is the reverse of removal.
|
Hood Release Handle Replacement
| 1. |
Using a socket (B), remove the hood release handle (A).
|
| 2. |
Installation is the reverse of removal.
|
Hood Latch Replacement
| 1. |
Remove the front bumper cover.
(Refer to the BD group - "Front Bumper")
|
| 2. |
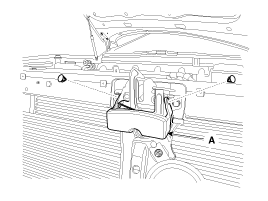
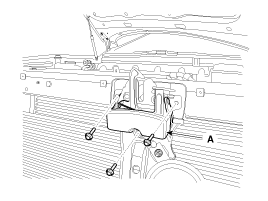
Detach the clips, then remove hood latch cover (A).
|
| 3. |
Remove the hood latch (A) mounting bolts.
|
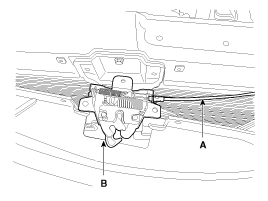
| 4. |
Disconnect the hood latch cable (A) and remove the latch (B).
|
| 5. |
Installation is the reverse of removal.
|
Adjustment
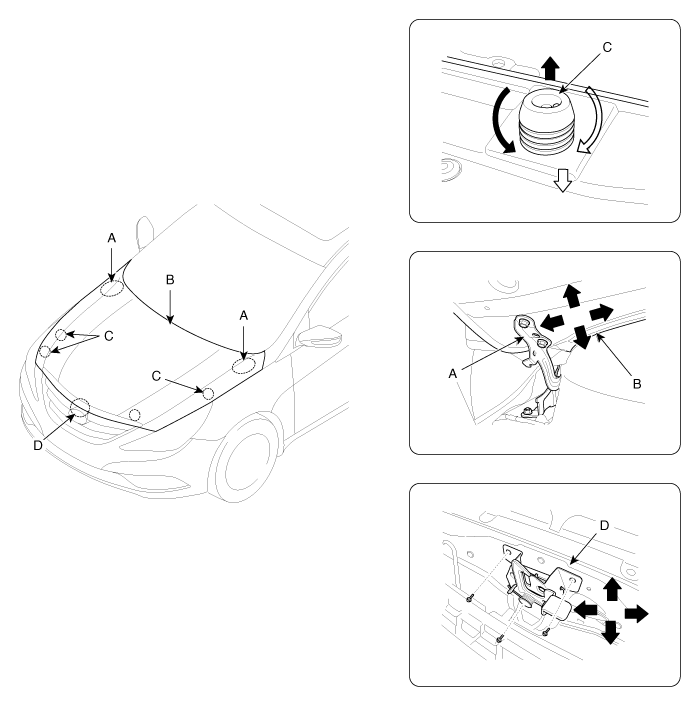
Adjust Hood
| 1. |
After loosening the hinge (A) mounting bolt, adjust the hood (B)
by moving it up or down, or right or left.
|
| 2. |
Adjust the hood height by turning the hood overslam bumpers (C).
|
| 3. |
After loosening the hood latch (D) mounting bolts, adjust the
latch by moving it up or down, or right or left.
|
 Fender. Repair procedures
Replacement
•
Be careful not to damage the hood and body.
•
...
 Trunk Lid. Repair procedures
Replacement
Trunk Lid Assembley Replacement
•
When removing and installing the trunk lid, an as ...
See also:
Auto up/down window
Pressing or pulling up the power window switch momentarily to the second detent
position (6) completely lowers or lifts the window even when the switch is released.
To stop the window at the des ...
Brake Pedal. Repair procedures
Removal
1.
Remove the crash pad lower panel. (Refer to the Body group- crash
pad).
2.
Pull down steering column shaft after removing bolts ...
Side Body. Body Repair
Side Body A
Side Body B
...

