 Hyundai Sonata: Automatic Transaxle. Repair procedures
Removal
| 1. |
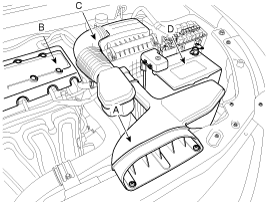
Remove the following items;
|
| 2. |
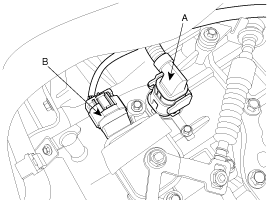
Dissconnect the solenoid valve connector (A) and
inhibitor switch connector (B).
|
| 3. |
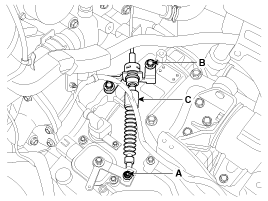
Remove the shift cable (C) after removing the nut
(A) and the bolt (B).
|
| 4. |
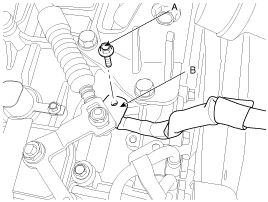
Remove the ground line (B) after removing the bolt
(A).
|
| 5. |
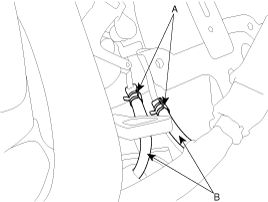
Disconnect the hose (B) after removing the automatic
transaxle fluid cooler hose clamp (A).
|
| 6. |
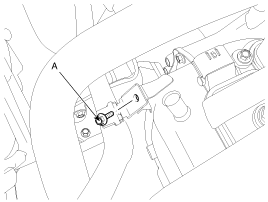
Remove the wiring bracket installation bolt (A).
|
| 7. |
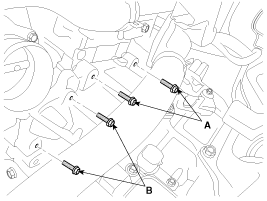
Remove the automatic transaxle upper mounting bolt
(A-2ea) and the starter motor mounting bolt (B-2ea).
|
| 8. |
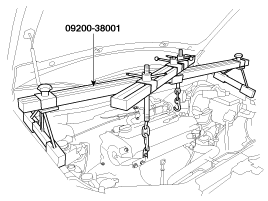
Using the SST (09200-38001), hold the engine and
transaxle assembly safely.
|
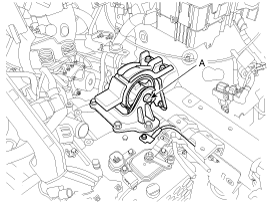
| 9. |
Remove the automatic transaxle mounting support bracket
bolt (A).
|
| 10. |
Lift the vehicle with a jack.
|
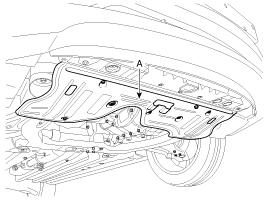
| 11. |
Remove the under cover (A).
|
| 12. |
Remove the Sub frame assembly. (Refer to "Front suspension
system" in SS group.)
|
| 13. |
Remove the drive shaft assembly. (Refer to "Drive
shaft assembly " in DS group.)
|
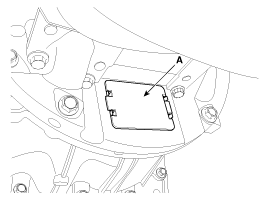
| 14. |
Remove the dust cover(A).
|
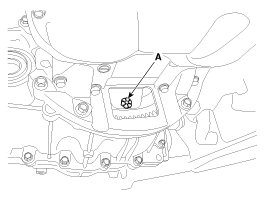
| 15. |
Remove the torque converter mounting bolt (A-4ea)
with rotating the crankshaft.
|
| 16. |
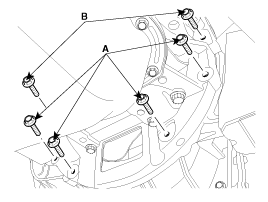
Remove the automatic transaxle with a jack after
removing the mounting bolt (A-4ea, B-2ea).
|
Installation
| 1. |
Installation is the reverse of removal.
|
After replacement or reinstallation procedure of
the automatic transaxle assembly, must perform procedures below.
|
|
 Automatic Transaxle. Components and Components Location
Components (1)
Components (2)
1. Automatic transaxle case
2. Low & reverse brake piston
3. Low & reverse brake return spring
4. Snap ring
5. Front annulus ...
See also:
Air conditioning
Press the A/C button to turn the air conditioning system on (indicator light
will illuminate). Press the button again to turn the air conditioning system off. ...
Repair procedures
Inspection
Front Door Lock Actuator Inspection
1.
Remove the front door trim.
(Refer to the BD group - "Front door")
2.
R ...
Front Impact Sensor (FIS) Components and Components Location
Components
...

