 Hyundai Sonata: Windshield Deicer Switch. Repair procedures
Inspection
| 1. |
The windshield deicer switch inputs can be checked using the GDS.
|
| 2. |
To check the input value of windshield deicer switch, select option
"Body Control Module".
|
| 3. |
Select option "Current Data of smart junction box".
|
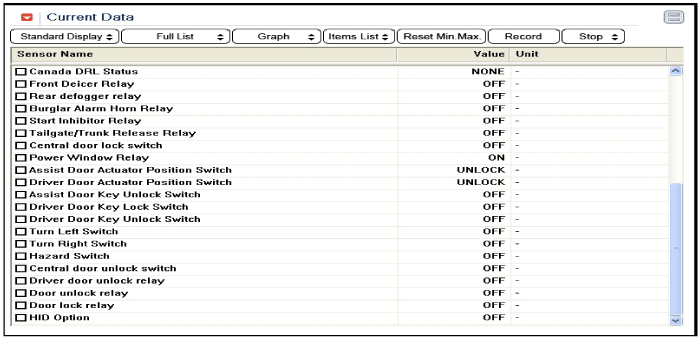
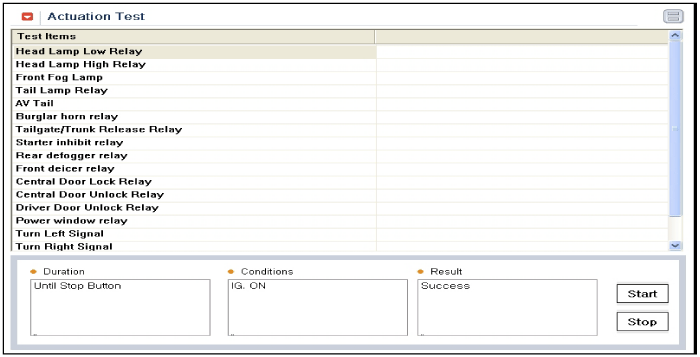
| 4. |
To check the input value of windshield deicer switch in force
mode, select option "Actuation Test of smart junction box".
|
Removal
| 1. |
Disconnect the negative (-) battery terminal.
|
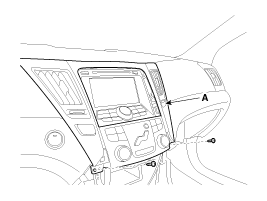
| 2. |
Remove the center fascia panel (A) after loosening the mounting
screws.
|
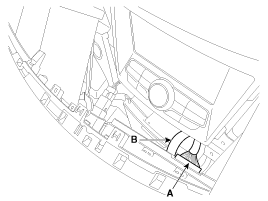
| 3. |
Disconnect the heater control unit connector (A) and hose (B).
|
| 4. |
Remove the heater control unit contained the windshield deicer
switch from the center fascia panel.
|
Installation
| 1. |
Install the heater control unit.
|
| 2. |
Install the center fascia panel.
|
| 3. |
Install the crash pad garnish.
|
 Repair procedures
Inspection
1.
Remove the cowl top cover. (Refer to the wiper)
2.
Disconnect the windshield deicer connector (A) from the wiper
motor linka ...

See also:
Headlamp welcome function
When the headlight switch is in the ON or AUTO position and all doors (and trunk)
are closed and locked, if you press the door unlock button on the transmitter (or
the smart key), the headlights w ...
Audio Unit. Description and Operation
Description
Introduction to CD
•
If the temperature inside the car is too high, open the car windows
for ventilation before using your car audio.
•
...
Illuminated engine start/stop button
Whenever the front door is opened, the engine start/stop button will illuminate
for your convenience. The light will go off after about 30 seconds when the door
is closed. ...
