 Hyundai Sonata: Battery replacement
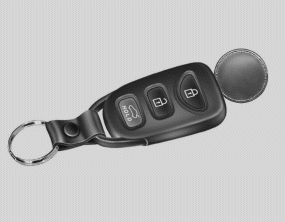
The transmitter uses a 3 volt lithium battery which will normally last for several years. When replacement is necessary, use the following procedure.
1. Insert a slim tool into the slot and gently pry open the transmitter center
cover.
2. Replace the battery with a new battery (CR2032). When replacing the battery,
make sure the battery positive “+” symbol faces up.
3. Install the battery in the reverse order of removal.
For replacement transmitters, see an authorized HYUNDAI dealer for transmitter reprogramming.
CAUTION
- The transmitter is designed to give you years of trouble-free use, however it can malfunction if exposed to moisture or static electricity. If you are unsure how to use your transmitter or replace the battery, contact an authorized HYUNDAI dealer.
- Using the wrong battery can cause the transmitter to malfunction. Be sure to use the correct battery.
- To avoid damaging the transmitter, don't drop it, get it wet, or expose it to heat or sunlight.
CAUTION
An inappropriately disposed battery can be harmful to the environment and human health.
Dispose the battery according to your local law(s) or regulation.
 Transmitter precautions
✽ NOTICE
The transmitter will not work if any of following occur:
The ignition key is in ignition switch.
You exceed the operating distance limit (about 90 feet [30 m]).
The battery in ...
 Theft-alarm system
This system is designed to provide protection from unauthorized entry into the
vehicle. This system is operated in three stages: the first is the "Armed" stage,
the second is the " ...
See also:
Special Service Tools
Special tools
Tool(Number and Name)
Illustration
Use
09495-33000
Puller
Removal of spider assembly from a drive sha ...
Manual climate control system
1. Turn the ignition switch to the ON position.
2. Turn the mode selection knob to the defrost position ().
3. Push the air intake control button at least 5 times within 3 seconds.
The indicator ...
Vehicle break-in process
No special break-in period is needed. By following a few simple precautions for
the first 600 miles (1,000 km) you may add to the performance, economy and life
of your vehicle.
Do not race the ...
