 Hyundai Sonata: Front Washer Motor. Repair procedures
Inspection
| 1. |
With the washer motor connected to the reservoir tank, fill the
reservoir tank with water.
|
| 2. |
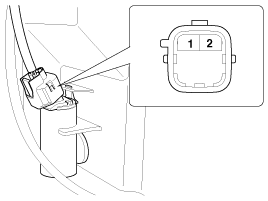
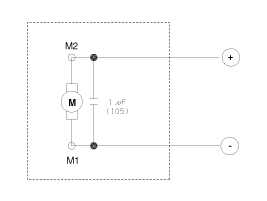
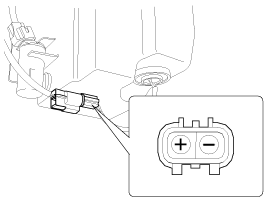
Connect positive (+) battery cables to terminal 1 and negative
(-) battery cables to terminal 2 respectively.
|
| 3. |
Check that the motor operates normally and the washer motor runs
and water sprays from the front nozzles.
|
| 4. |
If they are abnormal, replace the washer motor.
Connector No.1 : Windshield washer(+),
2 : Ground
|
Washer Fluid Level Sensor Switch
| 1. |
Disconnect the negative(-) battery terminal.
|
| 2. |
Drain the washer fluid less than 650 cc.
|
| 3. |
Check for continuity between the No. 1 and No.2 terminal in each
float position.
There should be continuity when the float is down.
There should be no continuity when the float is up.
|
| 4. |
If the continuity is not as specified, replace the washer fluid
level switch.
|
Removal
|
| 1. |
Disconnect the negative (-) battery terminal.
|
| 2. |
Remove the front bumper.
(Refer to the BD group - "Front bumper")
|
| 3. |
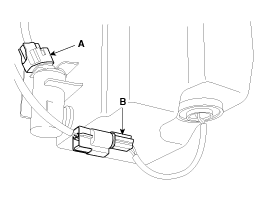
Remove the washer hose and disconnect the washer motor connector
(A) and level sensor connector (B).
|
| 4. |
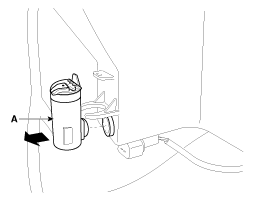
Remove the washer motor (A).
|
| 5. |
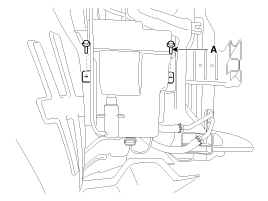
Remove the washer reservoir (A) after removing 2 bolts.
|
Installation
| 1. |
Install the washer reservoir.
|
| 2. |
Install the washer motor.
|
| 3. |
Install the washer hose.
|
| 4. |
Connect the washer motor connector and level sensor connector.
|
| 5. |
Install the front bumper.
|
| 6. |
Check the washer motor operation.
|
 Front Wiper Motor. Repair procedures
Removal
1.
Loosen the windshield wiper arm nut (A) after removing a wiper
cap (B).
2.
Remove the windshield wiper arm and blade (A ...
See also:
Headlamp welcome function
When the headlight switch is in the ON or AUTO position and all doors (and trunk)
are closed and locked, if you press the door unlock button on the transmitter (or
the smart key), the headlights w ...
Components and Components Location
Components Location
1. PCV Valve
2. Canister
3. Purge Control Solenoid Valve (PCSV)
4. Fuel Tank Pressure Sensor (FTPS)
5. Canister Close Valve (CCV)
6. Fuel ...
Special Service Tools
Special Service Tools
Tool (Number and name)
Illustration
Use
Alternator pulley remover wrench
(09373-27000)
Remova ...

