 Hyundai Sonata: Repair procedures
Removal
| 1. |
Disconnect the negative (-) battery terminal.
|
| 2. |
Remove the driver crash pad lower panel.
(Refer to the BD group - "Crash pad")
|
| 3. |
Remove the steering column upper and lower shrouds.
(Refer to the BD group - "Crash pad")
|
| 4. |
Remove the wiper switch.
(Refer to the BE group - "Multifunction switch")
|
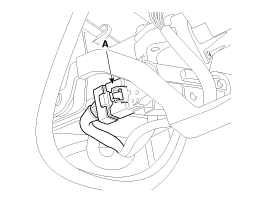
| 5. |
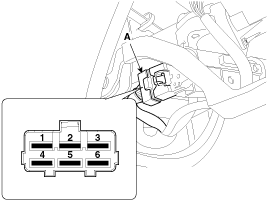
Remove the ignition switch after disconnecting the ignition switch
6P connector (A)
|
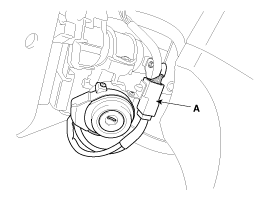
| 6. |
Remove the key warning/immobilizer connector (A).
|
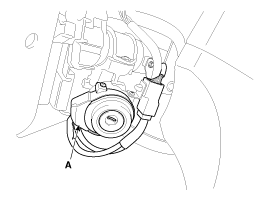
| 7. |
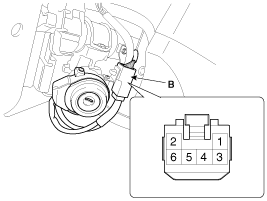
After loosening the screw, remove the key warning switch and key
Illumination (A).
|
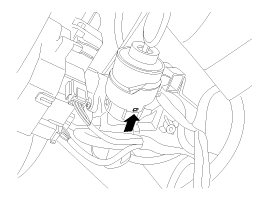
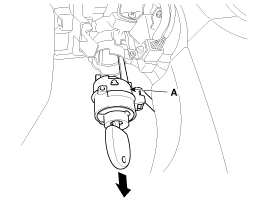
| 8. |
Pushing lock pin with key ACC.
|
| 9. |
Remove the key lock cylinder (A).
|
Installation
| 1. |
Install the key lock cylinder.
|
| 2. |
Install the key warning switch and key Illumination.
|
| 3. |
Install the key warning/immobilizer connector.
|
| 4. |
Connect the ignition switch connector after Install the ignition
switch.
|
| 5. |
Install the wiper switch.
|
| 6. |
Install the steering column shrouds.
|
| 7. |
Install the driver crash pad lower panel.
|
Inspection
| 1. |
Disconnect the ignition switch connector (A) and key warning switch
connector (B) from the steering column.
|
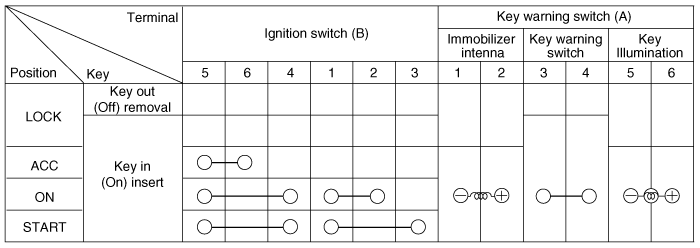
| 2. |
Check for continuity between the terminals.
|
| 3. |
If continuity is not specified, replace the switch.
|
See also:
Solenoid valve. Repair procedures
Removal
1.
Remove the battery and the battery tray. (Refer to
"Charging system" in EE group.)
2.
Remove the under cover (A).
...
XM radio
Using XM satellite Radio
Your vehicle is equipped with a 3 month complimentary period of XM Satellite
Radio. XM provides access to over 130 channels of music, information, and entertainment
progr ...
Sunroof. Components and Components Location
Components
1. Glass panel assembly
2. Drip link
3. Guide assembly
4. Sunshade assembly
5. Drip rail
6. Deflector
7. Deflector link assembly
8. Sunroof ...

