 Hyundai Sonata: Torque Converter Control Solenoid Valve (T/CON_VFS). Repair procedures
Inspection
| 1. |
Turn ignition switch OFF.
|
| 2. |
Disconnect the oil temperature sensor connector.
|
| 3. |
Measure resistance between sensor signal terminal
and sensor ground terminal.
|
| 4. |
Check that the resistance is within the specification.
|
Removal
| 1. |
Remove the automatic transaxle assembly.
(Refer to "Automatic Transaxle/Repair procedures"
in AT group.)
|
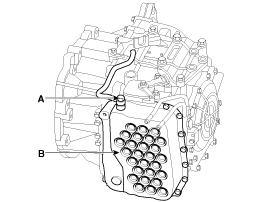
| 2. |
Remove the air breeder hose (A).
|
| 3. |
Remove the valve body cover (B).
|
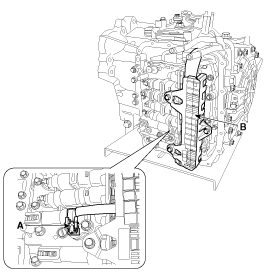
| 4. |
Remove the bolt (3ea) after disconnecting the solenoid
valve connector (B) and the oil temperature sensor connector (A).
|
| 5. |
Remove the solenoid valve support bracket (B) and
the valve body mounting bolt (A-1ea).
|

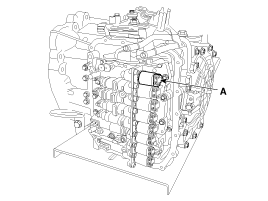
| 6. |
Remove the torque converter control solenoid valve
(A).
|
Installation
| 1. |
Installation is the reverse of removal.
|