 Hyundai Sonata: Hood. Repair procedures
Replacement
|
| 1. |
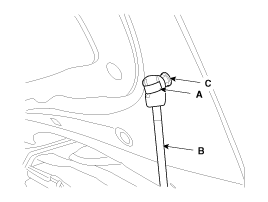
Using a screwdriver, lift the socket clips (A) up slightly on
both ends of the lifter (B), and then remove the lifter from the bracket
(C).
|
| 2. |
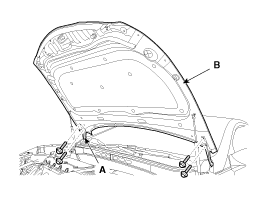
After loosening the hood hinge (A) mounting bolts, remove the
hood panel (B).
|
| 3. |
Installation is the reverse of removal.
|
| 1. |
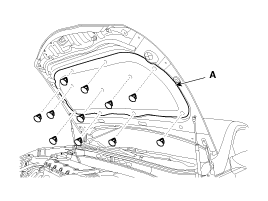
Using a clip remover, detach the clips, and remove the hood insulator
Pad (A).
|
| 2. |
Installation is the reverse of removal.
|
| 1. |
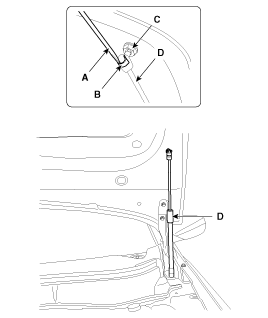
Using a screwdriver (A), lift the socket clips (B) up slightly
on both ends of the lifter (D), and then remove the lifter from the
bracket (C).
|
| 2. |
Installation is the reverse of removal.
|
| 1. |
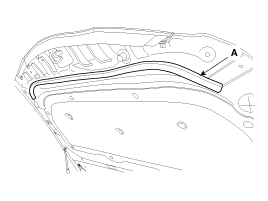
Detach the clips, then remove the hood seal weatherstrip (A).
|
| 2. |
Installation is the reverse of removal.
|
| 1. |
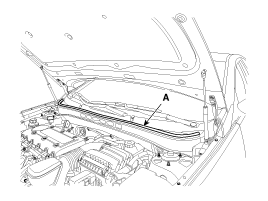
Detach the clips, remove the hood weatherstrip (A).
|
| 2. |
Installation is the reverse of removal.
|
| 1. |
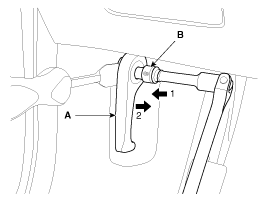
Using a socket (B), remove the hood release handle (A).
|
| 2. |
Installation is the reverse of removal.
|
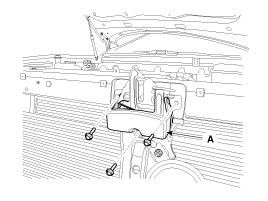
| 1. |
Remove the front bumper cover.
(Refer to the BD group - "Front Bumper")
|
| 2. |
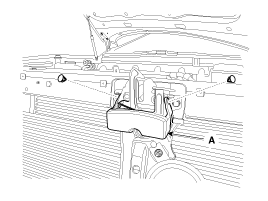
Detach the clips, then remove hood latch cover (A).
|
| 3. |
Remove the hood latch (A) mounting bolts.
|
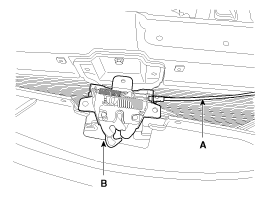
| 4. |
Disconnect the hood latch cable (A) and remove the latch (B).
|
| 5. |
Installation is the reverse of removal.
|
Adjustment
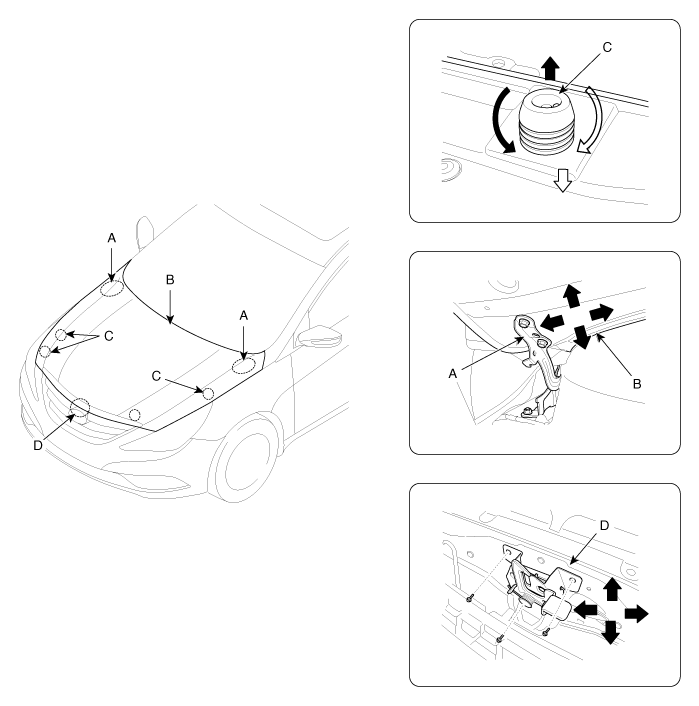
| 1. |
After loosening the hinge (A) mounting bolt, adjust the hood (B)
by moving it up or down, or right or left.
|
| 2. |
Adjust the hood height by turning the hood overslam bumpers (C).
|
| 3. |
After loosening the hood latch (D) mounting bolts, adjust the
latch by moving it up or down, or right or left.
|
 Fender. Repair procedures
Replacement
•
Be careful not to damage the hood and body.
•
...
 Trunk Lid. Repair procedures
Replacement
Trunk Lid Assembley Replacement
•
When removing and installing the trunk lid, an as ...
See also:
Manual Transaxle. Repair procedures
Removal
1.
Remove the air duct(A).
2.
Remove the engine cover(B).
3.
Remove the air cleaner assembly(C).
...
Steering Column and Shaft. Repair procedures
Replacement
1.
Disconnect the battery negative cable from the battery and then
wait for at least 30 seconds.
2.
Turn the steering wheel so ...
To increase cruise control set speed
Follow either of these procedures:
Push the RES+ switch and hold it. Your vehicle will accelerate. Release
the switch at the speed you want.
Push the RES+ switch and release it immediatel ...

