 Hyundai Sonata: Trunk Lid. Repair procedures
Replacement
Trunk Lid Assembley Replacement
|
| 1. |
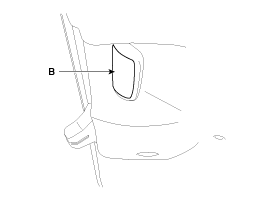
Remove the trunk inside hondle cover (B).
|
| 2. |
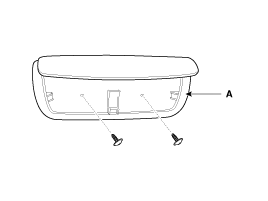
After loosening the mounting screws, then remove the trunk inside
handle (A).
|
| 3. |
Detach the clips, then remove the trunk lid trim (A).
|
| 4. |
Disconnect wiring the connectors.
|
| 5. |
After loosening the mounting bolts, then remove the trunk lid
(A).
|

| 6. |
Installation is the reverse of removal.
|
Trunk Lid Weatherstrip Replacement
| 1. |
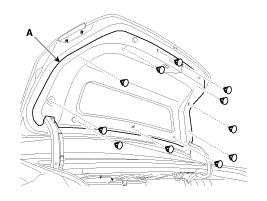
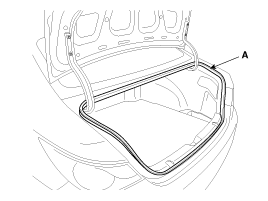
Remove the trunk lid weatherstrip (A).
|
| 2. |
Installation is the reverse of removal.
|
Key Holder Replacement
| 1. |
Remove the trunk lid trim.
|
| 2. |
Disconnect the inside handle cable (A), then loosen the key holder
(B) mounting bolts and remove.
|

| 3. |
Installation is the reverse of removal.
|
Trunk Lid Latch Replacement
| 1. |
Remove the trunk lid trim.
|
| 2. |
Disconnect the connector (A).
|
| 3. |
Disconnect the cable (B), then loosen the latch assembly (C) mounting
bolts and remove.
|
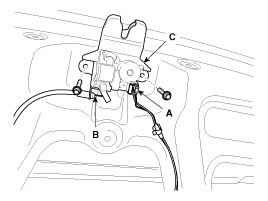
| 4. |
Installation is the reverse of removal.
|
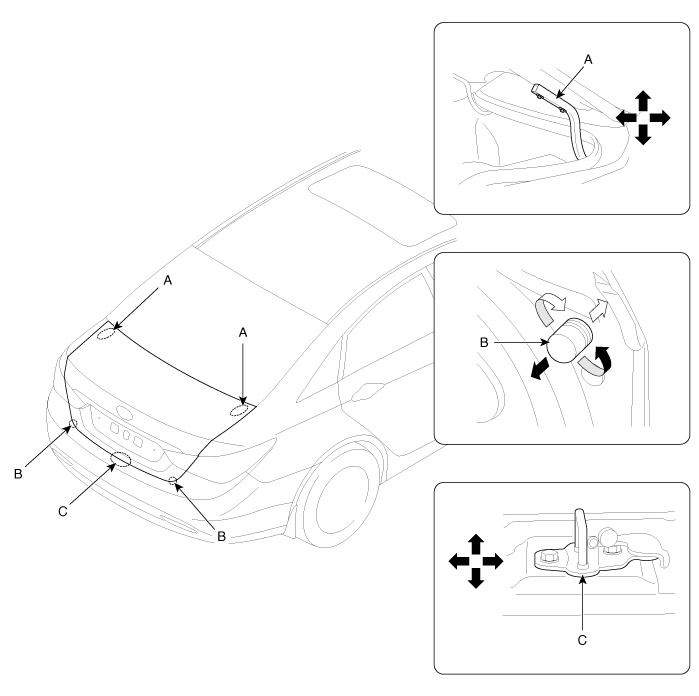
Adjustment
| 1. |
After loosening the trunk lid hinge (A) mounting bolt, adjust
the trunk lid by moving it up or down, or right or left.
|
| 2. |
Adjust the trunk lid height by turning the trunk lid overslam
bumpers (B).
|
| 3. |
After loosening the trunk lid latch (C) mounting bolts, adjust
the trunk lid latch by moving it up or down, or right or left.
|
 Hood. Repair procedures
Replacement
Hood Assembly Replacement
•
When removing and installing the hood, an assistant is ...
 Fuel Fill Door. Repair procedures
Replacement
1.
Remove the fuel fill door cap (A).
2.
After loosening the mounting screws, then remove the fuel fill
door catch pac ...
See also:
Fob Holder. Repair procedures
Removal
1.
Disconnect the negative(-) battery terminal.
2.
Remove the floor console.
(Refer to the BD group - "Console")
...
Description and Operation
Description
Mobile Telemetics System (MTS)
Hyundai motor companies are now faced with the task of shifting their
paradigm from vehicle-centered services to customer valuecentered services, ...
Components and Components Location
Component Location
1. Start Stop Button(SSB)
2. FOB key holder
3. FOB key
4. PDM(Power Distribution Module)
5. Smart key unit
6. RF receiver
7. Body control modul ...
