 Hyundai Sonata: Rear Bumper. Repair procedures
Replacement
|
| 1. |
Remove the following items.
|
| 2. |
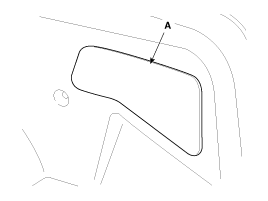
Remove the rear combination lamp cover (A).
|
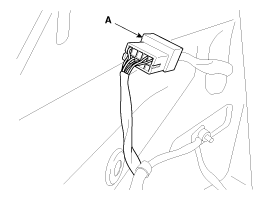
| 3. |
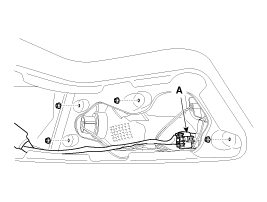
Disconnect the connector (A), and then remove the rear combination
lamp mounting nuts.
|
| 4. |
Remove the rear combination lamp.
|
| 5. |
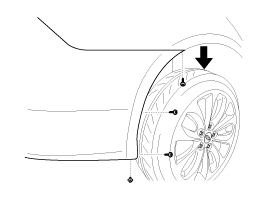
After loosening the rear bumper side's mounting clip and screws,
then disconnect the side's.
|
| 6. |
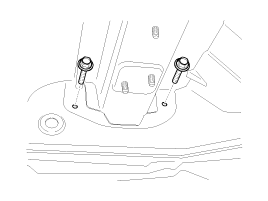
Remove the mounting bolts.
|
| 7. |
Disconnect the connector (A).
|
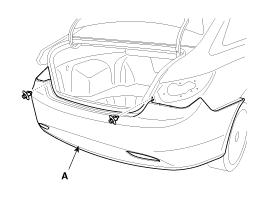
| 8. |
Loosen the rear bumper cover mounting clips, and then remove the
rear bumper cover (A).
|
| 9. |
Installation is the reverse of removal.
|
 Rear Bumper. Components and Components Location
Components
1. Rear bumper cover
2. Energy up sober
3. Rear bumper side bracket
...

See also:
Vanity mirror lamp
Pull the sunvisor downward and you can turn the vanity mirror lamp ON or OFF
by pushing the button.
• : To turn the lamp ON.
: To turn the lamp OFF.
CAUTION
To prevent unnecessary cha ...
Daytime running light
Daytime Running Lights (DRL) can make it easier for others to see the front of
your vehicle during the day. DRL can be helpful in many different driving conditions,
and it is especially helpful af ...
Valve Body. Specifications
Specification
Piece
3pcs
Spool
20ea
Control
Full line pressure variable control
Torque converter release control
...
