 Hyundai Sonata: Speakers. Repair procedures
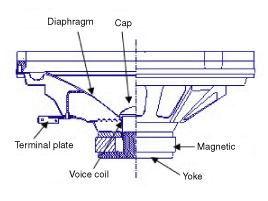
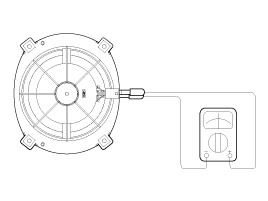
Inspection
| 1. |
Troubleshooting for Speaker
|
Removal
| 1. |
Remove the front door trim panel.
(Refer to the BD group - "Front door")
|
| 2. |
Remove the front speaker (A) after loosening 4 screws.
|
| 1. |
Remove the rear door trim panel.
(Refer to the BD group - "Rear door")
|
| 2. |
Remove the rear speaker (A) after removing 4 screws.
|
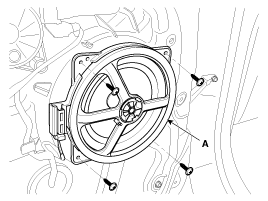
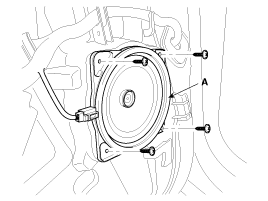
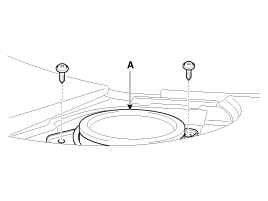
| 1. |
Remove the crash pad side speaker grill (A).
|
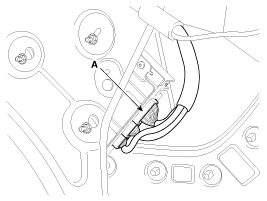
| 2. |
Remove the midrange speaker (A) after loosening the mounting screws.
|
| 3. |
Disconnect the midrange speaker connector (A).
|
| 1. |
Fold the rear seat forward.
(Refer to the BD group - "Rear seat")
|
| 2. |
Remove the rear package tray.
(Refer to the BD group - "Package tray")
|
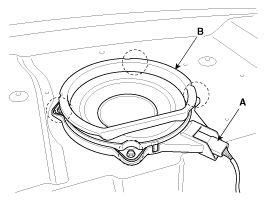
| 3. |
Disconnect the subwoofer speaker connector (A).
|
| 4. |
Remove the subwoofer speaker (B) after removing 4 bolts.
|
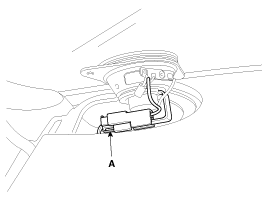
| 1. |
Remove the trunk right luggage side trim.
(Refer to the BD group - "Interior trim")
|
| 2. |
Remove the external amplifier connector (A).
|
| 3. |
Remove the external amplifier (A) after loosening the mounting
nuts.
|

Installation
| 1. |
Install the front speaker.
|
| 2. |
Install the front door trim.
|
| 1. |
Install the rear speaker.
|
| 2. |
Install the rear door trim.
|
| 1. |
Install the midrange speaker.
|
| 2. |
Install the speaker grille.
|
| 1. |
Install the subwoofer speaker after connecting the connector.
|
| 2. |
Install the rear package tray and rear seat assembly.
|
| 1. |
Install the external amplifier after connecting the connector.
|
| 2. |
Install the trunk right luggage side trim.
|
 Audio Unit. Repair procedures
Removal
•
Take care not to scratch the center fascia panel and related
parts.
...
 Antenna. Repair procedures
Inspection
Glass Antenna Test
1.
Wrap aluminum foil (A) around the tip of the tester probe (B)
as shown.
2.
Touch one tester p ...
See also:
Power Out Side Mirror Switch. Repair procedures
Inspection
1.
Disconnect the negative (-) battery terminal.
2.
Remove the front door trim panel.
(Refer to the BD group - "Front d ...
Mode selection
Type A
The mode selection button controls the direction of the air flow through the
ventilation system.
The air flow outlet port is converted as follows:
Face-Level (B, D, E C, F)
Air flow ...
Parking Brake Assembly. Components and Components Location
Components (1)
1. Parking brake pedal
2. Parking brake cable
3. Equalizer assembly
4. Parking brake lever assembly
Components (2)
1 ...
