 Hyundai Sonata: Audio Unit. Repair procedures
Removal
|
| 1. |
Disconnect the negative (-) battery terminal.
|
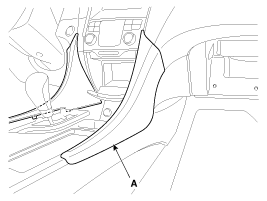
| 2. |
Remove the crash pad garnish (A).
|
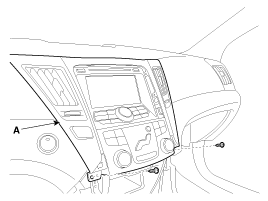
| 3. |
Remove the crash pad center fascia panel (A), after loosening
the mounting screws.
|
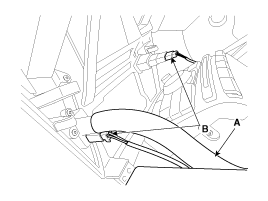
| 4. |
Disconnect the center fascia panel connectors (B), after removing
the air condition hose (A) from the upper side of center fascia panel.
|
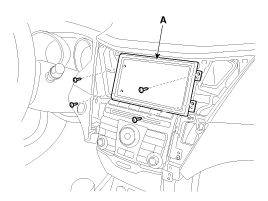
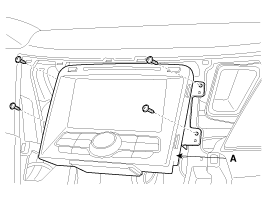
| 5. |
Remove the audio monitor (A) after loosening the mounting screws.
(For PA760)
|
| 6. |
Disconnect the monitor connectors (A). (For PA760)
|
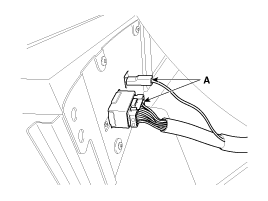
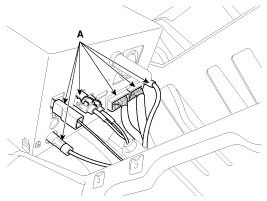
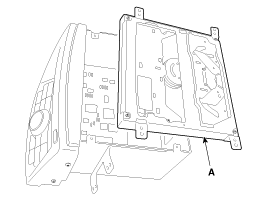
| 7. |
Remove the mounting screws then remove the audio head unit (A).
|
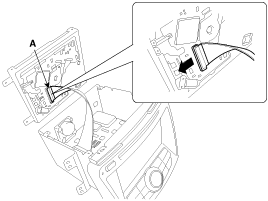
| 8. |
Remove the audio head unit connectors and cables (A).
|
Disassembly
|
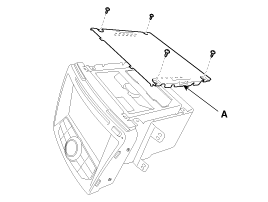
| 1. |
Remove the top cover (A) from the audio head unit after loosening
the mounting screws.
|
| 2. |
Disassemble the CD-rom drive (A) from the audio head unit.
|
| 3. |
Disconnect the ribbon connector (A) between the unit and the drive.
|
Reassembly
| 1. |
Reconnect the ribbon connector between the drive and audio head
unit.
|
| 2. |
Reassemble the CD-rom drive to the audio unit.
|
| 3. |
Reassemble the top cover.
|
Installation
| 1. |
Connect the audio unit connectors and cables.
|
| 2. |
Install the audio unit.
|
| 3. |
Install the crash pad center fascia panel.
|
| 4. |
Install the crash pad garnish.
|
| 5. |
Check the audio system.
|
 Audio Unit. Schematic Diagrams
System Block Diagram
...
 Speakers. Repair procedures
Inspection
1.
Troubleshooting for Speaker
(1)
Basic inspection of speaker
Inspect the sound from speaker after verifying that ...
See also:
If the engine will not start
If engine doesn't turn over or turns over slowly
1. If your vehicle has an automatic transaxle, be sure the shift lever is in
N (Neutral) or P (Park) and the emergency brake is set.
2. Check t ...
Hood. Repair procedures
Replacement
Hood Assembly Replacement
•
When removing and installing the hood, an assistant is ...
To defog inside windshield
1. Select any fan speed except “0” position.
2. Select desired temperature.
3. Select the or
position.
4. The outside (fresh) air will be selected automatically.
If the outside (fresh) ai ...
