 Hyundai Sonata: Front Cross Member. Repair procedures - Revised
Replacement
| 1. |
Remove the front wheel & tire.
|
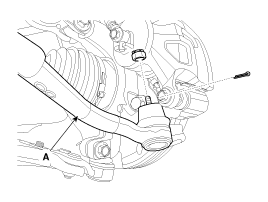
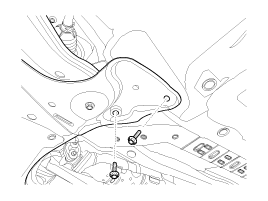
| 2. |
Loosen the bolt (A) and then disconnect the universal joint assembly
from the pinion of the steering gear box.
|
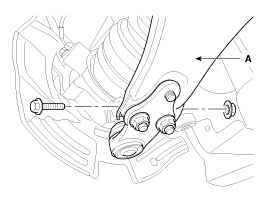
| 3. |
Remove the split pin and castle nut and then disconnect the tie-rod
end (A) from the front knuckle.
|
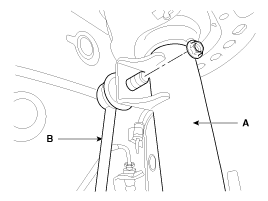
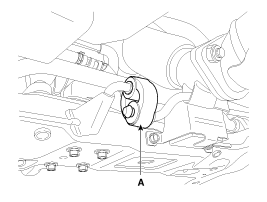
| 4. |
Loosen the bolt & nut and then remove the lower arm (A).
|
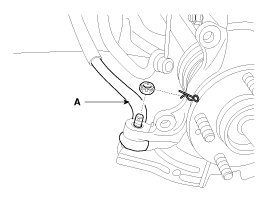
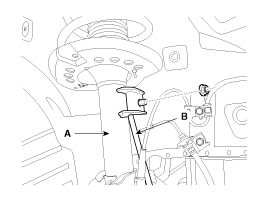
| 5. |
Disconnect the stabilizer link (B) with the front strut assembly
(A) after loosening the nut.
|
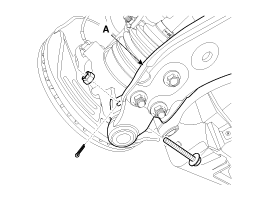
| 6. |
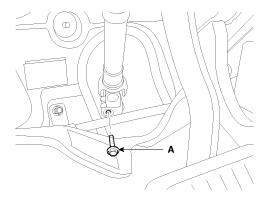
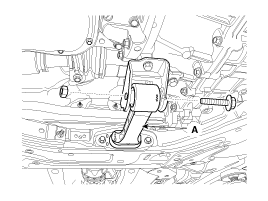
Loosen the bolt (A) & nut (B) and then remove the front roll stopper.
|
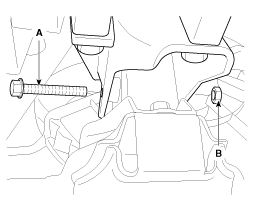
| 7. |
Loosen the rear roll stopper mounting bolts (A).
|
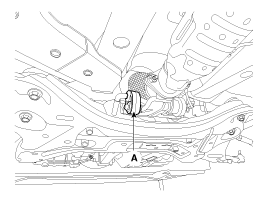
| 8. |
Disconnect the muffler rubber hanger (A).
|
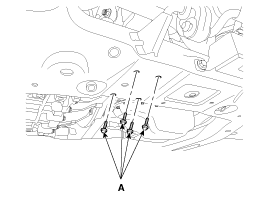
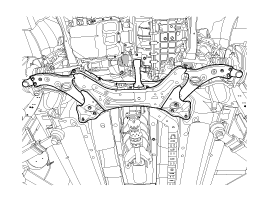
| 9. |
Loosen the bolts & nuts and then remove the sub frame.
|
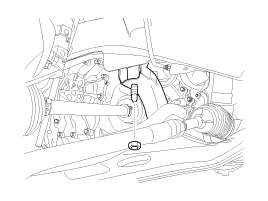
| 10. |
Remove the front lower arm.
(Refer to the Front lower arm)
|
| 11. |
Remove the front stabilizer.
(Refer to the Front stabilizer)
|
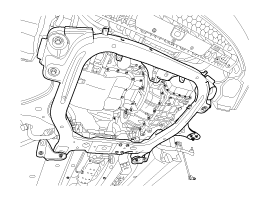
| 12. |
Remove the steering gearbox.
(Refer to the ST group - 'steering gearbox')
|
| 13. |
Installation is the reverse of removal.
|
| 14. |
Check the alignment.
(Refer to 'Tires/Wheels - alingment')
|
Replacement
| 1. |
Remove the front wheel & tire.
|
| 2. |
Loosen the bolt (A) and then disconnect the universal joint assembly
from the pinion of the steering gear box.
|
| 3. |
Remove the split pin and castle nut and then disconnect the tie-rod
end (A) from the front knuckle.
|
| 4. |
Loosen the bolt & nut and then remove the lower arm (A).
|
| 5. |
Disconnect the stabilizer link (B) with the front strut assembly
(A) after loosening the nut.
|
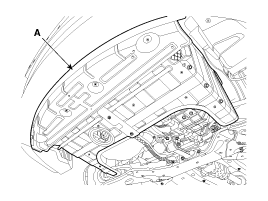
| 6. |
Remove the under cover (A).
|
| 7. |
Loosen the rear roll stopper mounting bolts (A).
|
| 8. |
Disconnect the muffler rubber hanger (A).
|
| 9. |
Loosen the bolts & nuts and then remove the sub frame.
|


| 10. |
Remove the front lower arm.
(Refer to Front lower arm)
|
| 11. |
Remove the front stabilizer.
(Refer to Front stabilizer)
|
| 12. |
Remove the steering gearbox.
(Refer to ST group - 'steering gearbox')
|
| 13. |
Installation is the reverse of removal.
|
| 14. |
Check the alignment.
(Refer to 'Tires/Wheels - alingment')
|
 Front Stabilizer Bar. Repair procedures - Revised
Replacement
1.
Remove the front wheel & tire.
Tightening torque:
88.3 ~ 107.9 N.m (9.0 ~ 11.0 kgf.m, 65.1 ~ 79.6 lb-ft)
...

See also:
Rear Repair procedures
Replacement
Rear Seat Belt Replacement
•
When installing the belt, make sure not to damaged the ...
Changing a tire with TPMS
If you have a flat tire, the Low Tire Pressure will come on. Have the flat tire
repaired by an authorized HYUNDAI dealer as soon as possible or replace the flat
tire with the spare tire.
CAUTION
...
Preparation Of Tools And Measuring Equipment
Be sure that all necessary tools and measuring equipment
are available starting work.
Special Tools
Use special tools when they are required.
Removal Of Parts
First find th ...
