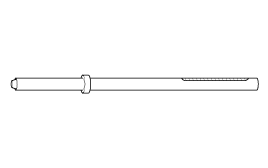
 Hyundai Sonata: Steering Gear box. Repair procedures - Revised
Replacement
| 1. |
Remove the front wheel & tire.
|
| 2. |
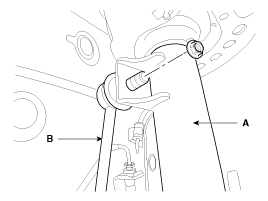
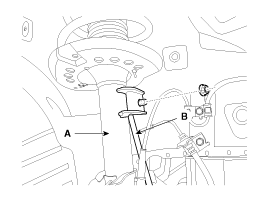
Disconnect the stabilizer link (B) with the front strut assembly
(A) after loosening the nut.
|
| 3. |
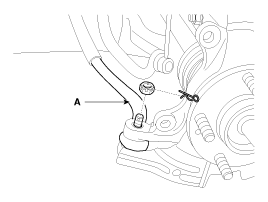
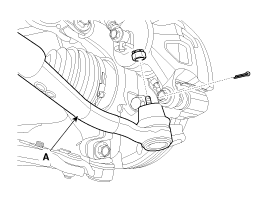
Remove the split pin and castle nut and then disconnect the tie-rod
end (A) from the front knuckle.
|
| 4. |
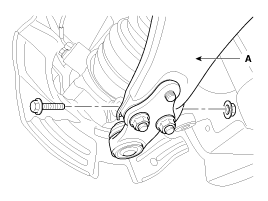
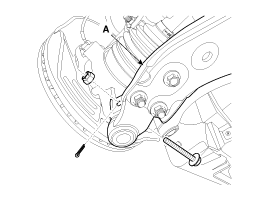
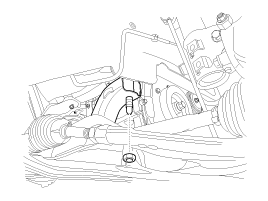
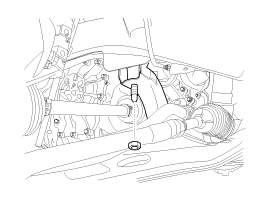
Loosen the bolt & nut and then remove the lower arm (A).
|
| 5. |
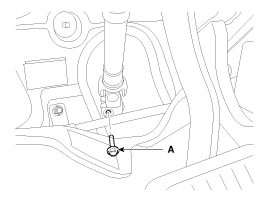
Loosen the bolt (A) and then disconnect the universal joint assembly
from the pinion of the steering gear box.
|
| 6. |
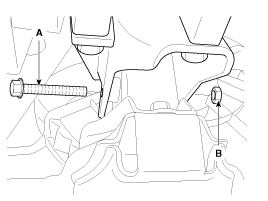
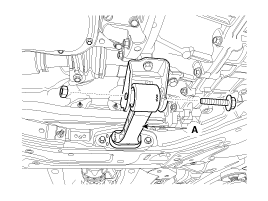
Loosen the bolt (A) & nut (B) and then remove the front roll stopper.
|
| 7. |
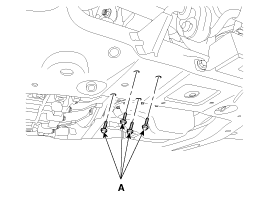
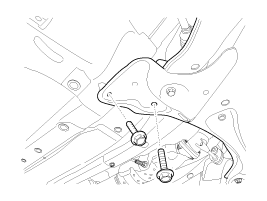
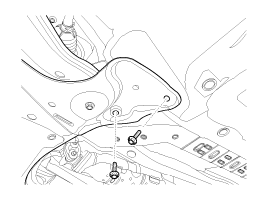
Loosen the rear roll stopper mounting bolts (A).
|
| 8. |
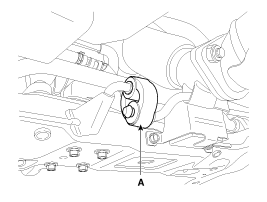
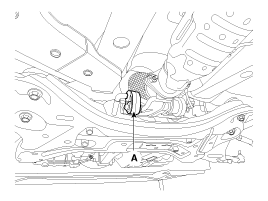
Disconnect the muffler rubber hanger (A).
|
| 9. |
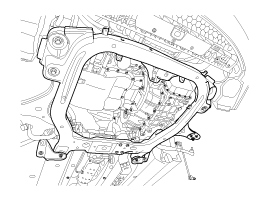
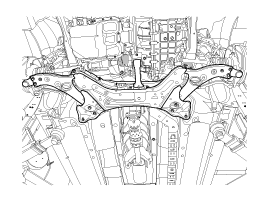
Loosen the bolts & nuts and then remove the sub frame.
|
| 10. |
Loosen the bolt and then remove the protactor.
|
| 11. |
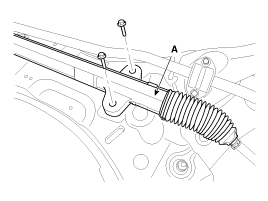
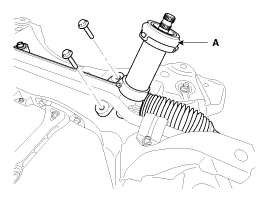
Loosen the bolt and then remove the steering gear box (A).
|
| 12. |
Installation is the reverse of the removal.
|
| 13. |
Check the alignment. (Refer to SS group 'Tires/Wheels - alingment')
|
Replacement
| 1. |
Remove the front wheel & tire.
|
| 2. |
Disconnect the stabilizer link (B) with the front strut assembly
(A) after loosening the nut.
|
| 3. |
Remove the split pin and castle nut and then disconnect the tie-rod
end (A) from the front knuckle.
|
| 4. |
Loosen the bolt & nut and then remove the lower arm (A).
|
| 5. |
Loosen the bolt (A) and then disconnect the universal joint assembly
from the pinion of the steering gear box.
|
| 6. |
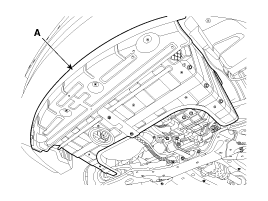
Remove the under cover (A).
|
| 7. |
Loosen the bolt & nut and then remove the roll rod stopper (A).
|
| 8. |
Disconnect the muffler rubber hanger (A).
|
| 9. |
Loosen the bolts & nuts and then remove the sub frame.
|
| 10. |
Loosen the bolt and then remove the protactor.
|
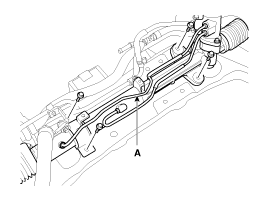
| 11. |
Loosen the bolt and then remove the steering gear box (A).
|
| 12. |
Installation is the reverse of the removal.
|
| 13. |
Check the alignment.
(Refer to SS group 'Tires/Wheels - alingment')
|
Disassembly
| 1. |
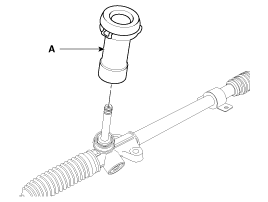
Remove the dust packing & cap (A) from the pinion housing.
|
| 2. |
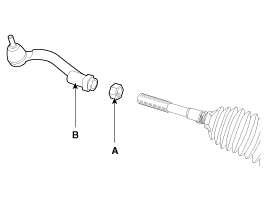
Loosen the lock nut and then remove the tie rod end (B) and lock
nut (A) from the tie rod.
|
| 3. |
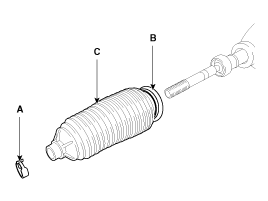
Remove the bellows clip (A) and band (B) and then pull the bellows
(C) away from the end of the tie rod.
|
| 4. |
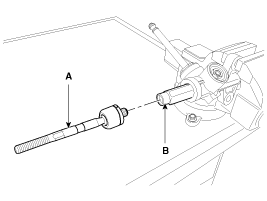
Remove the tie rod (B) from the rack bar (A) by unscrewing the
tie rod inner ball joint.
|
| 5. |
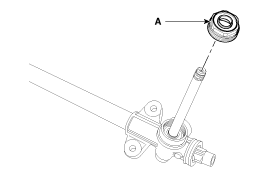
Remove the plug (A) from the pinion housing.
|
| 6. |
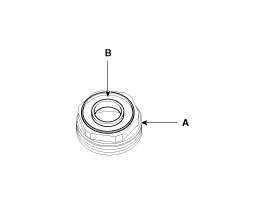
Remove the oil seal (B) from the plug (A).
|
| 7. |
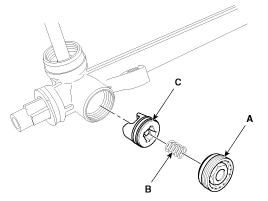
Remove the yoke plug (A) and spring (B) and then pull out the
support yoke (C).
|
| 8. |
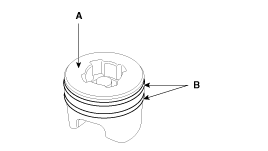
Remove the O-ring (B) from the support yoke assembly (A).
|
| 9. |
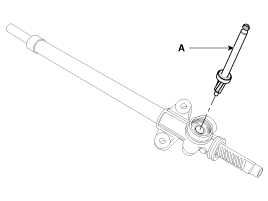
Pull the pinion assembly (A) out of the pinion housing.
|
| 10. |
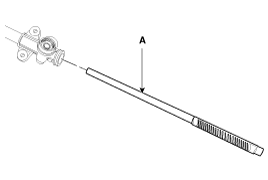
Pull the rack bar (A) out of the rack housing.
|
| 11. |
Reassembly is the reverse of the disassembly.
|
Inspection
| 1. |
Rack bar
|
| 2. |
Pinion assembly
|
| 3. |
Check the inside of rack housing for damage.
|
| 4. |
Check the bellows for being torn.
|
 Steering Gear box. Components and Components Location
Components
1. Tie rod end
2. Lock nut
3. Bellows
4. Bellows band
5. Tie rod
6. Rack bar
7. Dust packing
8. Dust cap
9. Oil seal
10. Pinion p ...
 Restraint
...
See also:
Hands Free Switch. Repair procedures
Inspection
1.
Check the hands free remote control switch for resistance between
No.3 and No.4 terminals in each switch position.
...
Ventilation
1. Set the mode to the position.
2. Set the air intake control to the outside (fresh) air position.
3. Set the temperature control to the desired position.
4. Set the fan speed control to the desi ...
Multimedia jack. Repair procedures
Removal
1.
Remove the shift lever knob.
(Refer to the BD group - "Console")
2.
Remove the console upper cover (A).
...

