Replacement
Roof Molding Replacement
| •
|
When prying with a flat-tip screwdriver, wrap itwith protective
tape, and apply protective tapearound the related parts, to
prevent damaged.
|
| •
|
Put on gloves to protect your hands.
|
| •
|
Take care not to scratch the body surface.
|
|
|
1. |
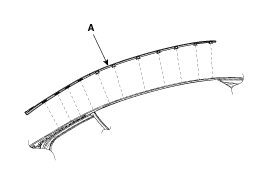
Using a screwdriver or remover, remove the roof molding (A).
|
|
2. |
Installation is the reverse of removal.
|
• |
Replace any damage clips.
|
|
|
Trunk Iid Garnish Replacement
| •
|
When prying with a flat-tip screwdriver, wrap itwith protective
tape, and apply protective tapearound the related parts, to
prevent damaged.
|
| •
|
Put on gloves to protect your hands.
|
| •
|
Take care not to scratch the body surface.
|
|
|
1. |
Remove the trunk lid trim.
(Refer to the BD group - "Trunk Iid")
|
|
2. |
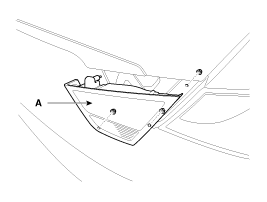
After loosening the mounting nuts, then remove the rear combination
lamp (A).
|
|
3. |
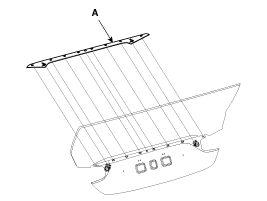
Using a screwdriver or remover, remove the trunk lid garnish (A).
|
|
4. |
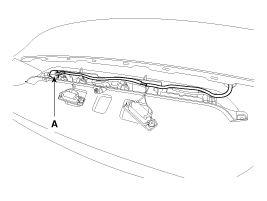
Disconnect the connector (B).
|
|
5. |
Installation is the reverse of removal.
|
• |
Replace any damage clips.
|
|
• |
Make sure the trunk lid locks/unlocks and opens/closes
properly.
|
|
|
Fender Garnish Replacement
| •
|
When prying with a flat-tip screwdriver, wrap itwith protective
tape, and apply protective tapearound the related parts, to
prevent damaged.
|
| •
|
Put on gloves to protect your hands.
|
| •
|
Take care not to scratch the body surface.
|
|
|
1. |
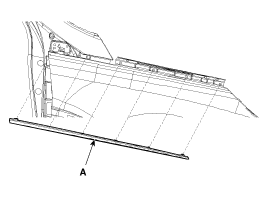
Using a screwdriver or remover, remove the fender garnish (A).
|
|
2. |
Installation is the reverse of removal.
|
• |
Replace any damage clips.
|
|
|
Side Sill Garnish Replacement
| •
|
When prying with a flat-tip screwdriver, wrap itwith protective
tape, and apply protective tapearound the related parts, to
prevent damaged.
|
| •
|
Put on gloves to protect your hands.
|
| •
|
Take care not to scratch the body surface.
|
|
|
1. |
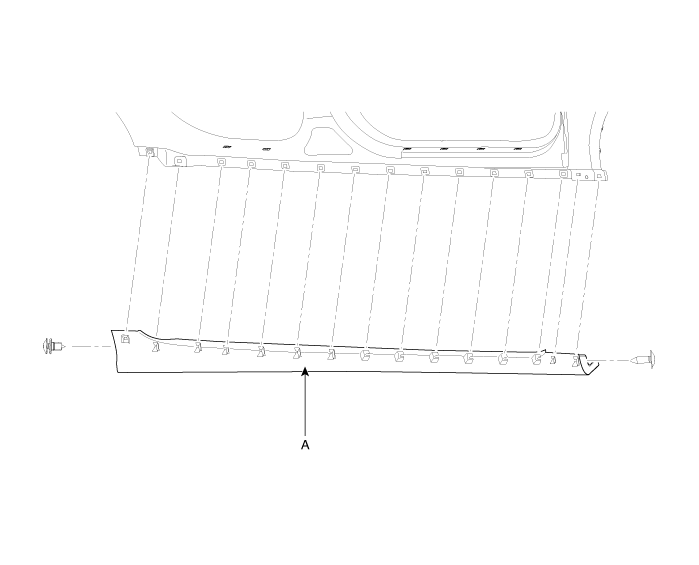
Loosen the mounting screws.
|
|
2. |
Using a screwdriver or remover, remove the side sill garnish (A).
|
|
3. |
Installation is the reverse of removal.
|
• |
Replace any damage clips
|
|
|
Replacement
Door Trim Replacement
•
Be careful not to scratch the door trim and other parts.
...
Components
1. Glass panel assembly
2. Drip link
3. Guide assembly
4. Sunshade assembly
5. Drip rail
6. Deflector
7. Deflector link assembly
8. Sunroof ...
See also:
Instrument panel illumination
When the vehicle’s parking lights or headlights are on, push the illumination
control switch left or right to adjust the brightness of the instrument panel illumination.
The illumination ...
Schematic Diagrams
Schematic Diagram
...
Master Cylinder. Repair procedures
Removal
1.
Turm ignition switch OFF and disconnect the negative (-) battery
cable.
2.
Remove the air cleaner assembly (A).
...
 Hyundai Sonata: Body Side Moldings. Repair procedures
 Rear Door. Repair procedures
 Sunroof. Components and Components Location


