 Hyundai Sonata: Intake Manifold. Repair procedures
Removal and Installation
| 1. |
Remove the engine cover.
|
| 2. |
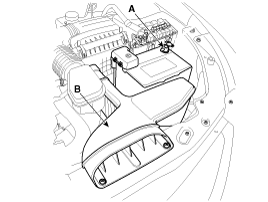
Disconnect the battery negative terminal (A).
|
| 3. |
Remove the air duct (B).
|
| 4. |
Remove the air cleaner assembly.
|

| 5. |
Remove the under cover.
|
| 6. |
Loosen the drain plug, and drain the engine coolant.
Remove the radiator cap to drain with speed.
(Refer to Cooling system in this group)
|
| 7. |
Disconnect the intake OCV (Oil control valve) connector
(A).
|

| 8. |
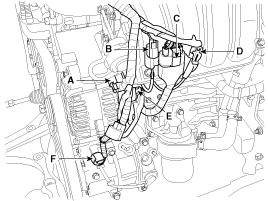
Disconnect the VIS (Variable intake system) connector
(A), the OPS (Oil pressure switch) connector (B), the injector extension
connector (C), the knock sensor connector (D), the alternator connector
(E) and the air compressor connector (F).
|
| 9. |
Disconnect the ETC (Electronic throttle control)
connector (A) and MAPS (Manifold absolute pressure sensor) & IATS (Intake
air temperature sensor) connector (B).
|
| 10. |
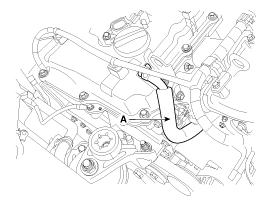
Disconnect the PCV (Positive crankcase ventilation)
hose (A).
|
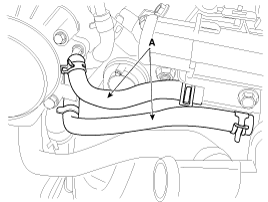
| 11. |
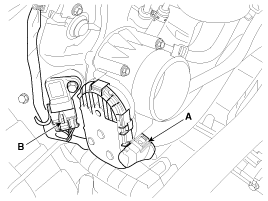
Disconnect the vacuum hose (A) and PCSV (Purge control
solenoid valve) hose (B).
|
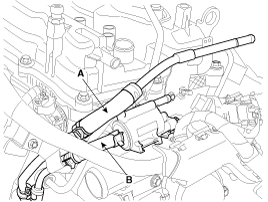
| 12. |
Disconnect the throttle body coolant hoses (A).
|
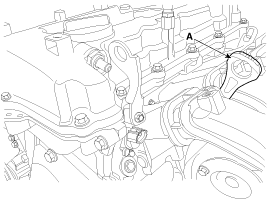
| 13. |
Remove the oil level gauge (A).
|
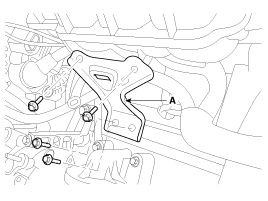
| 14. |
Remove the intake manifold stay (A).
|
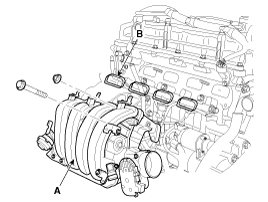
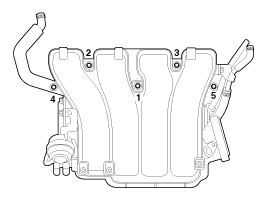
| 15. |
Remove the intake manifold (A) with the gasket (B).
When installing the intake manifold, tighten the
bolts and nuts with pre-torque first, and then tighten the bolts and
nuts with specified torque in the sequence shown.
|
| 16. |
Installation is reverse order of removal.
|
 Intake Manifold. Components and Components Location
Components
1. Intake manifold assembly
2. Electronic throttle body
3. Intake manifold stay
4. Intake manifold gasket
...
 Exhaust Manifold. Components and Components Location
Components
[ULEV]
1. Heat protector
2. Exhaust manifold
3. Exhaust manifold gasket
4. Exhaust manifold stay
[SULEV]
1. Heat protec ...
See also:
Good driving practices
Never take the vehicle out of gear and coast down a hill. This is extremely
hazardous. Always leave the vehicle in gear.
Do not "ride" the brakes. This can cause them to overheat and ...
Multimedia Jack. Repair procedures
Removal
1.
Remove the shift lever knob.
(Refer to the BD group - "Console")
2.
Remove the console upper cover (A).
...
Body Control Module (BCM). Specifications
Specifications
Items
Specifications
Rated voltage
DC 12V
Operating voltage
DC 9 ~ 16V
Operating temp ...
