Hyundai Sonata: Rear Repair procedures - Seat Belt - Body (Interior and Exterior)Hyundai Sonata: Rear Repair procedures

Replacement

Rear Seat Belt Replacement
•
When installing the belt, make sure not to damaged the retractor.
1.
Remove the following items first.
A.
Rear seat assembly
(Refer to the BD group - "Rear Seat")
B.
Rear Piller trim
(Refer to the BD group - "Interior Trim")
2.
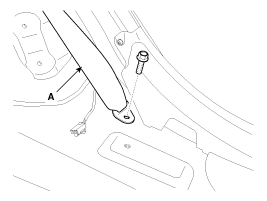
After loosening the mounting bolt, then remove the rear seat belt lower anchor (A).
[LH,RH]

Tightening torque :
39.2 ~ 53.9 N.m (4.0 ~ 5.5 kgf.m, 28.9 ~ 39.8 lb-ft)

[Center]

Tightening torque :
39.2 ~ 53.9 N.m (4.0 ~ 5.5 kgf.m, 28.9 ~ 39.8 lb-ft)

3.
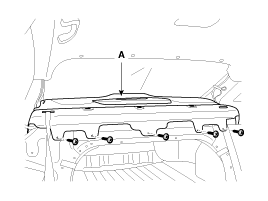
After loosening the mounting screws, then remove the package tray trim (A).

4.
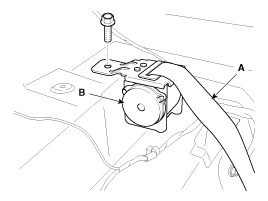
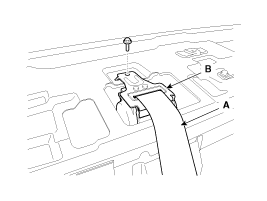
After loosening the rear seat belt retractor (B) mounting bolt, then remove the rear seat belt (A).
[LH,RH]

Tightening torque :
39.2 ~ 53.9 N.m (4.0 ~ 5.5 kgf.m, 28.9 ~ 39.8 lb-ft)

[Center]

Tightening torque :
39.2 ~ 53.9 N.m (4.0 ~ 5.5 kgf.m, 28.9 ~ 39.8 lb-ft)

5.
Installation is the reverse of removal.
Rear Seat Belt Buckle Replacement
1.
Remove the rear seat cushion assembly.
(Refer to Rear Seat - "Rear Seat Assembly")
2.
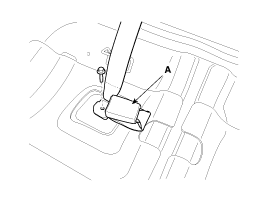
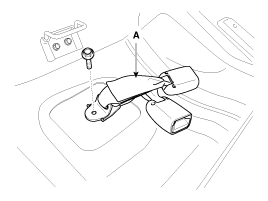
Loosen the mounting bolt, and then remove the rear seat belt buckle (A).
[LH]

Tightening torque :
39.2 ~ 53.9 N.m (4.0 ~ 5.5 kgf.m, 28.9 ~ 39.8 lb-ft)

[RH]

Tightening torque :
39.2 ~ 53.9 N.m (4.0 ~ 5.5 kgf.m, 28.9 ~ 39.8 lb-ft)

3.
Installation is the reverse of removal.

    Front Repair procedures
    Replacement Front Seat Belt Replacement • When installing the belt, make sure not to damaged th ...

    See also:

    Fuel Filler Door Open Switch. Repair procedures
    Inspection 1. Remove the switch assembly (A) from the crash pad lower panel. 2. Disconnect the switch connector. 3 ...

    Schematic Diagrams
    Circuit Diagram ...

    Flex Steer. Components and Components Location
    Components Location 1. Flex steering switch ...