 Hyundai Sonata: Manual Transaxle. Repair procedures
Removal
| 1. |
Remove the air duct(A).
|
| 2. |
Remove the engine cover(B).
|
| 3. |
Remove the air cleaner assembly(C).
|
| 4. |
Remove the battery and battery tray(D).
|

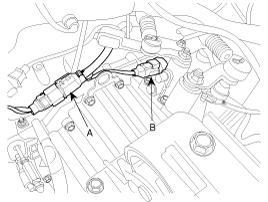
| 5. |
Disconnect the speed sensor connector (A).
|
| 6. |
Disconnect the back up lamp switch connector (B).
|
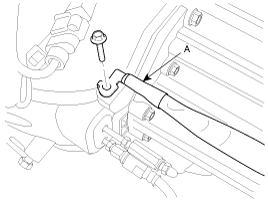
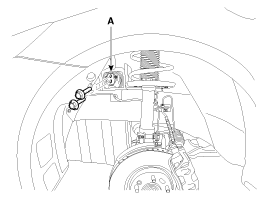
| 7. |
Remove the ground (A).
|
| 8. |
Disconnect the cable assemblies (A) after removing the clips (B)
and pins (C).
|
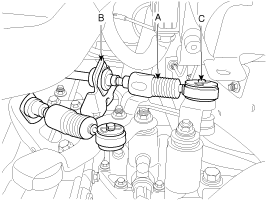
| 9. |
Disconnect the concentric slave cylinder tube(B) arter removing
the pins(A).
|
| 10. |
Using the special tool (A)(09200-38001), support the engine transaxle
assembly safely.
|
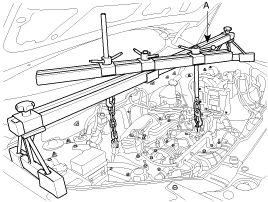
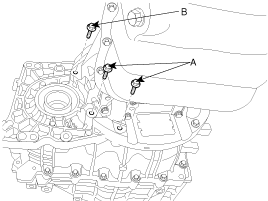
| 11. |
Remove the transaxle upper mounting bolts (B-2ea) and the starter
motor mounting bolts (A-2ea).
|
| 12. |
Remove the ECM. (Refer to "Engine Control system" in FL group.)
|
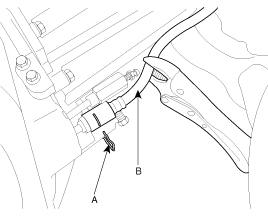
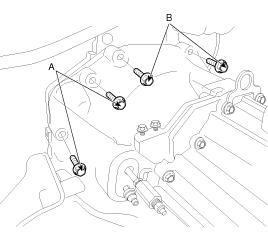
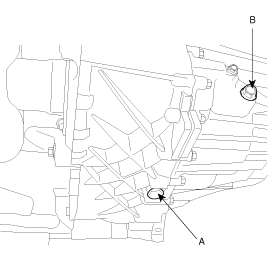
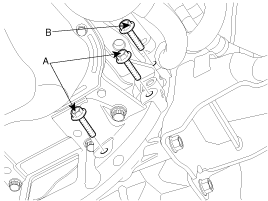
| 13. |
Remove the support mounting bolt (A).
|
| 14. |
Remove the automatic transaxle support bracket mounting bolt (A).
|
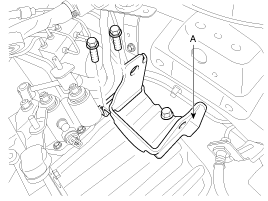
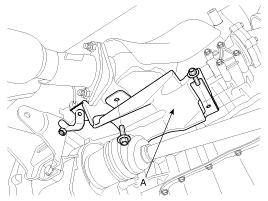
| 15. |
Remove the mounting bracket(A).
|
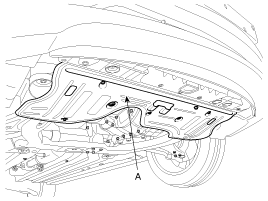
| 16. |
Remove the under shield cover(A).
|
| 17. |
Drain the manual transaxle fluid after removing the transaxle
drain plug(A).
It can be easier when the oil filler plug(B) is removed.
|
| 18. |
Remove the Sub frame assembly. (Refer to "Front suspension system"
in SS group.)
|
| 19. |
Remove the drive shaft assembly. (Refer to "Drive shaft assembly
" in DS group.)
|
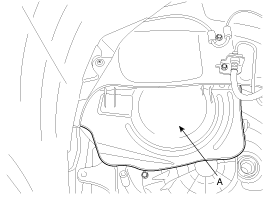
| 20. |
Remove the cover(A).
|
| 21. |
Remove the side cover(A).
|
| 22. |
Remove the mounting bolts(A-4ea, B-2ea) of lower part of the transaxle,
and the left side cover and remove the transaxle assembly by supporting
it with a jack.
|
Installation
| 1. |
Installation is the reverse of removal.
|
| 2. |
After completing the installation perform the following procedure;
|
 Manual Transaxle. Components and Components Location
Components
1. Transaxle case
2. Taper roller bearing outer race
3. 1st/2nd shift fork
4. Reverse shift fork
5. Shift rail
6. 3rd/4th shift fork
7. 5th/6th ...

See also:
Yaw-rate and Lateral G Sensor. Repair procedures
Removal
1.
Turn ignition switch OFF and disconnect the negative (-) battery
cable.
2.
Remove the floor console.
3.
...
Overhead Console Lamp. Repair procedures
Inspection
Remove the overhead console lamp assembly then check for continuity between
terminals. If the continuity is not as specified, replace the map lamp switch.
Removal
...
Aux, USB and iPod® port
If your vehicle has an aux and/or USB(universal serial bus) port or iPod port,
you can use an aux port to connect audio devices and a USB port to plug in a USB,
and an iPod port to plug in an ...
