 Hyundai Sonata: Radiator. Repair procedures
Removal and Installation
| 1. |
Disconnect the battery terminals.
(Refer to Engine and transaxle assembly in this group)
|
| 2. |
Remove the air cleaner assembly.
(Refer to Engine and transaxle assembly in this group)
|
| 3. |
Remove the battery and battery tray.
(Refer to Engine and transaxle assembly in this group)
|
| 4. |
Remove the under cover.
(Refer to Engine and transaxle assembly in this group)
|
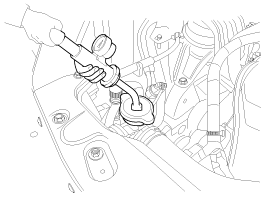
| 5. |
Loosen the drain plug, and drain the engine coolant.
Remove the radiator cap to drain with speed.
|
| 6. |
Disconnect the radiator upper hose (A), lower hose
(B) and then disconnect the fan motor connector (C).
|
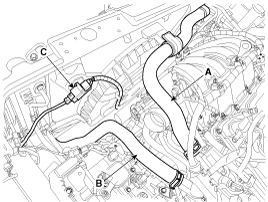
| 7. |
Disconnect the ATF cooler hoses (A/T only).
(Refer to AT group)
|
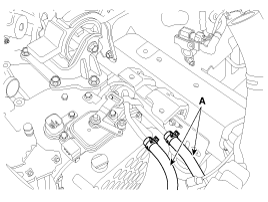
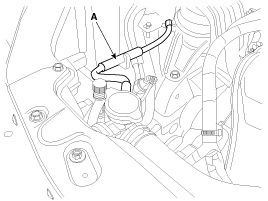
| 8. |
Disconnect the over flow hose (A) from the radiator.
|
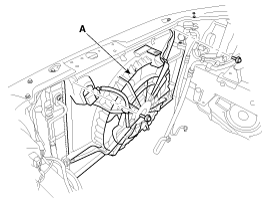
| 9. |
Remove the cooling fan assembly (A).
|
| 10. |
Remove the radiator mounting bracket (A).
|

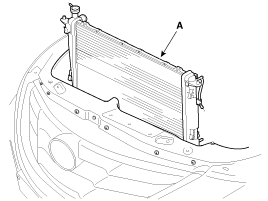
| 11. |
Separate the condenser from the radiator and then
remove the radiator assembly (A).
|
| 12. |
Installation is the reverse order of removal.
|
| 13. |
Fill the radiator with coolant and check for leaks.
|
Inspection
Radiator Cap Testing
| 1. |
Remove the radiator cap, wet its seal with engine
coolant, and then install it on a pressure tester.
|

| 2. |
Apply a pressure of 93.16 ~ 122.58 kPa (0.95 ~ 1.25
kgf/cm², 13.51 ~ 17.78 psi).
|
| 3. |
Check for a drop in pressure.
|
| 4. |
If the pressure drops, replace the cap.
|
Radiator Leakage Test
| 1. |
Wait until engine is cool, then carefully remove
the radiator cap and fill the radiator with engine coolant, then install
it on the pressure tester.
|
| 2. |
Apply a pressure tester to the radiator and apply
a pressure of 93.16 ~ 122.58kPa (0.95 ~ 1.25kgf/cm², 13.51 ~ 17.78psi).
|
| 3. |
Inspect for engine coolant leaks and a drop in pressure.
|
| 4. |
Remove the tester and reinstall the radiator cap.
|
 Radiator. Components and Components Location
Components
1. Cooling fan assembly
2. Radiator
3. Mounting insulator
4. Radiator mounting bracket
5. Radiator upper hose
6. Radiator lower hose
7. Reservo ...
 Water pump. Components and Components Location
Components
1. Water pump pulley
2. Water pump
3. Water pump gasket
4. Water pump housing
5. Water pump housing gasket
6. O-ring
7. Water inlet pipe
8. ...
See also:
Wipers and washers
A : Wiper speed control
· MIST – Single wipe
· OFF – Off
· INT – Intermittent wipe
· LO – Low wiper speed
· HI – High wiper speed
B : Intermittent or Auto control wipe time ad ...
Alignment. Repair procedures
Front Wheel Alignment
When using a commercially available computerized wheel alignment
equipment to inspect the front wheel al ...
General Safety Information and Caution
Precautions
General Precautions
Please read the following precautions carefully before performing the
airbag system service.
Observe the instructions described in this manual, ...
